Caledonian MacBrayne, or most often just CalMac, have an almost complete monopoly on ferry services in Scotland. They run efficient, friendly boat services between the Islands and also some time saving peninsular crossings. Their crossings are also great value for money.
Anyone visiting Scotland with a campervan will inevitably use CalMac’s services and here is my advice on getting the best when travelling in a ‘van.
The Berneray to Leverburgh ferry
Book early. During the peak season, most crossings are fully booked, so although it goes against the “freedom” ethos of campervanning, plan ahead and book your crossing well ahead of time.
Book all of your crossings. CalMac offer island hopping tickets which seem to imply you can make it up as you go along. We had a trip through the Hebrides with one of these tickets and almost missed our ferry back to the mainland because we hadn’t booked the “little ferry” between Berneray and Harris.
CalMac tickets are pretty flexible and the staff are helpful. The best way if you need to change times or crossing is to speak to someone in a ticket office or on the phone – they’ll happily refund tickets if you need a different crossing.
Don’t rely on just turning up early. CalMac changed their policy a few years ago so that campervans have a lower priority on standby than cars. This does not seem to happen on all crossings (for example not at Tarbert, but definitely at Stornaway). If you do go on standby, the staff really do try to squeeze you in; we missed one ferry by about a foot, after the staff spent some time shuffling vehicles in their attempt to get us aboard.
We stumbled on this site whilst exploring the circular road to Valtos. A single track road threads it’s way around the high ground of Niosa Mòr past the intriguingly named Cliff, Valtos, Cnip and Reef. The site consists of a track into the Machair and an honesty box.
It’s a treat to park overlooking the green Atlantic rollers rumbling onto the yellow sand and it’s quite popular, judging by the half dozen vans that arrived after us.
We stopped here at the end of a day when we had visited the Uig museum, Valtos pier with its tiny harbour built too late for the fishing industry and the impressive gneiss rock stacks at Mangersta.
This simple site is community run and another fantastic beach location. Sheltering behind the Machair, there are 10 campervan spaces (also camping spaces). Since we came last time (pre-pandemic), the price has gone up (£20 per night in the honesty box) and the pitches must be booked by phone. For this fee, basic facilities (toilets, showers, bins, washing up, toilet disposal and fresh water) are provided.
It’s a great place from which to explore the area – the enormous bay empties at low tide, revealing a huge area of yellow sand beneath the dunes. It’s also walking distance to the Abhainn Deargh (pronounced “avain derech”) distillery – well worth the visit. We had a tour from the distiller and sampled the proudly simple malt, all made from ingredients of the island – an exceptional whisky, less peaty than many of the Islays and having a complex and subtle flavour.
To the north of the sands, bisected by a small river, is the peninsula known as Uig which is effectively an island. The Uig museum, a short drive away, is well worth a visit and has a lot of background on the community from Norse times to present day. Ardroil is also the location of the discovery of the famous Norse chess set and a number of carvings in that style can be seen.
Whisky maturing in the spirit store at Abhainn Dearg distillery
Carving on Ardroil beach in the style of the Lewis chessmen
This site is pretty much my ideal campervan stop. It is on the beach with an unequalled view over miles of white sands, with islands in the distance. It is very informal, consisting of bin, tap and honesty box. Inevitably, it is quite popular too. When we arrived via the long uneven track, there were about a dozen vehicles there already, but there was still a choice of spots.
I was worried that it would not live up to my experience from our last visit, especially with the post-covid proliferation of camper vans. I needn’t have worried; we had a fantastic evening: a walk along the beach, a swim and even a clear night sky, complete with milky way, shooting stars and a hint of aurora.
Low tide at Clachan SandsA magic clear evening sky
Arriving on the Hebrides at Lochboisdale after a crossing from Mallaig, we drove straight to the North island and a booked spot at Balranald. The staff were very helpful and friendly, with modern and clean facilities. Situated on an RSPB reserve, there are walks on the beach less than 100m away.
The weather was very poor during our visit, but we didn’t need to leave the van to see the bird life around us – we enjoyed seeing the lapwings cartwheeling in the next field. The wind was so strong and gusty the first night that we dropped the roof and moved downstairs, even though we had the rear of the van facing into the wind. It’s the first time we’ve felt that necessary!
With lockdown finally easing and camp sites opening, this weekend is Alice’s long-awaited birthday party. Her actual birthday was last November but at the time no kind of celebration apart from a virtual one was possible. She wanted a camping trip with her friends, so we booked a weekend to bag a place if lockdown restrictions ended when planned.
We chose Woodside Lodge as our first location for a proper trip this year, a site we know well. We enjoy this place because of its relaxed atmosphere and open water swimming.
A dip in the lake
Alice wanted to try the camping barn, which sleeps four. This meant that Niki and I had the luxury of the Cali to ourselves.
The site is close to the Herefordshire town of Ledbury, so Niki too Alice and her three girlie friends into town for some retail therapy, whilst I took a leisurely walk through the fields.
The day was rounded off with the customary bbq and bonfire. Though the weather was cool, at least it was dry after the seemingly endless wet weather recently!
A meadow of buttercupsRape field with Ledbury in the background; the industrial silos just visible are the Heineken brewery. Dandelion clock
Our Cali’s diesel heater is really powerful and rarely needs to work too hard, but if anyone is sleeping upstairs, the temperature difference between the main cabin and the roof is quite large.
To improve the warmth for the upper bed at night, I’ve used an idea seen on the Cali forum and added a warm air pipe. This is made from two inexpensive plumbing parts, obtained from our local Wickes. An adapter is cable tied to the vent and to this, a collapsible hose is attached and draped over the cargo net in the roof.
In the summer, when the heating is not needed, the cable ties can be clipped off and the parts left at home.
This set up is amazingly effective. plenty of warmth escapes from the vent into the main cabin, but crucially the upstairs (which is after all, effectively a tent) is kept toasty warm. On the last couple of nights the outside temperature dipped several degrees below freezing and we were most comfortable overnight with the heater on a low setting. We do have an isotop liner to the roof canvas which helps, and I dare say we’d need a higher setting on the heater if it was windy.
At last we got on the highway! Our first outing, now the travel restrictions are eased, has been to visit both sets of our parents. What a great vehicle – we were able to park up and sleep aboard, something we’ve done a few times during the last year. Later in the week we’re going to do some “proper” camping!
With a foreign trip off the cards, and a few days of holiday to fill between two other trips, the family decided to visit one of our favourite local sites, Woodside Country Park near Ledbury in Herefordshire.
We like this place because it is a quiet, rural site, with relaxed rules and only an hour from home. When we booked, they were almost full and were at pains to point out that as returning customers, we would find it busier than normal.
We needn’t have worried; although the site was indeed much busier than normal, the pitches were still informal and well spaced. A consequence of the “new normal” post COVID was that there was less interaction between groups, but the facilities were by no means overloaded.
We had two nights of our usual activities – a walk into Ledbury, several swims in the lake and barbecues, with subsequent bonfires into the night. The weather was sweltering, so the lake was a great relief and the nights so warm, a jumper was definitely not needed. On the final night, we were treated to the awesome sight of huge thunderstorms lit up by lightning some 50 miles to the north (not far from home, in fact). It was amazing to watch flash after flash lighting up the cumulus, whilst the air was still and dry at the site.
Fitting a solar panel is something I’d been thinking about ever since we bought the van. On one hand, it would be handy to run the fridge continuously without worry whilst off-grid. On the other, the two leisure batteries in the Cali seem to cope most of the time, because we often drive each day. However, during lockdown I got really bored and wanted a project on the van to keep me busy for a little while (I spent much longer on this project than I needed to!).
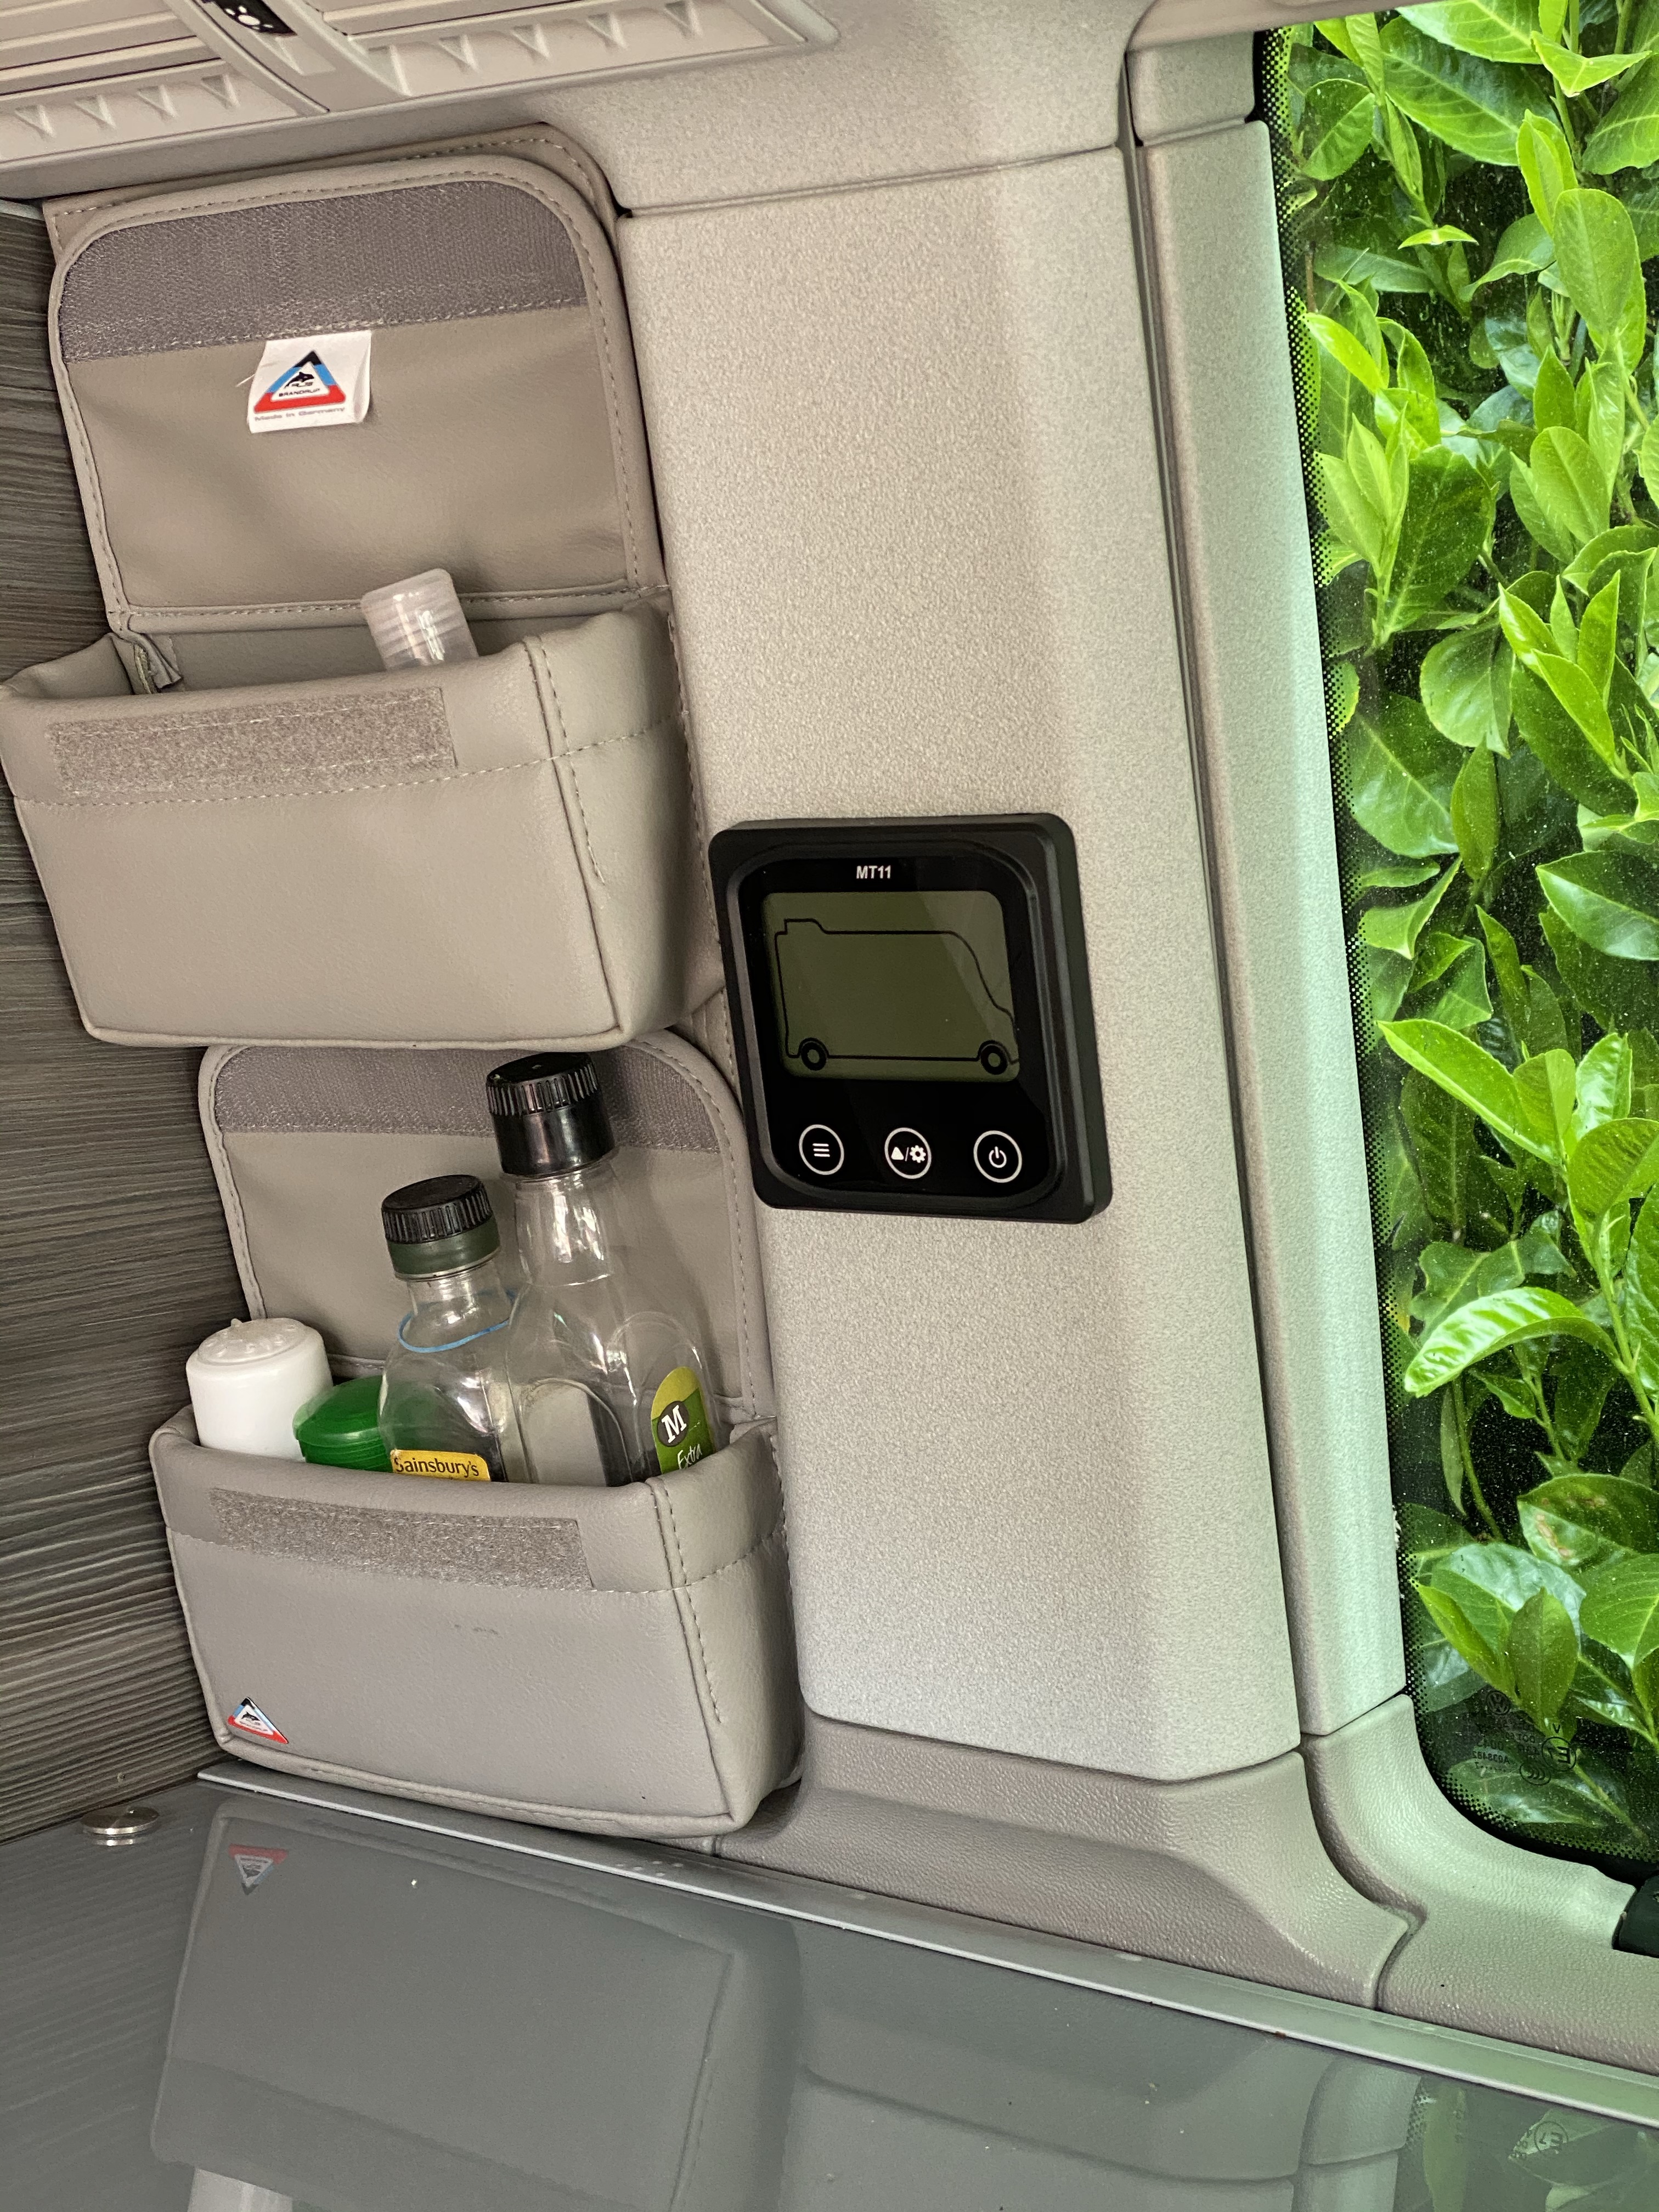
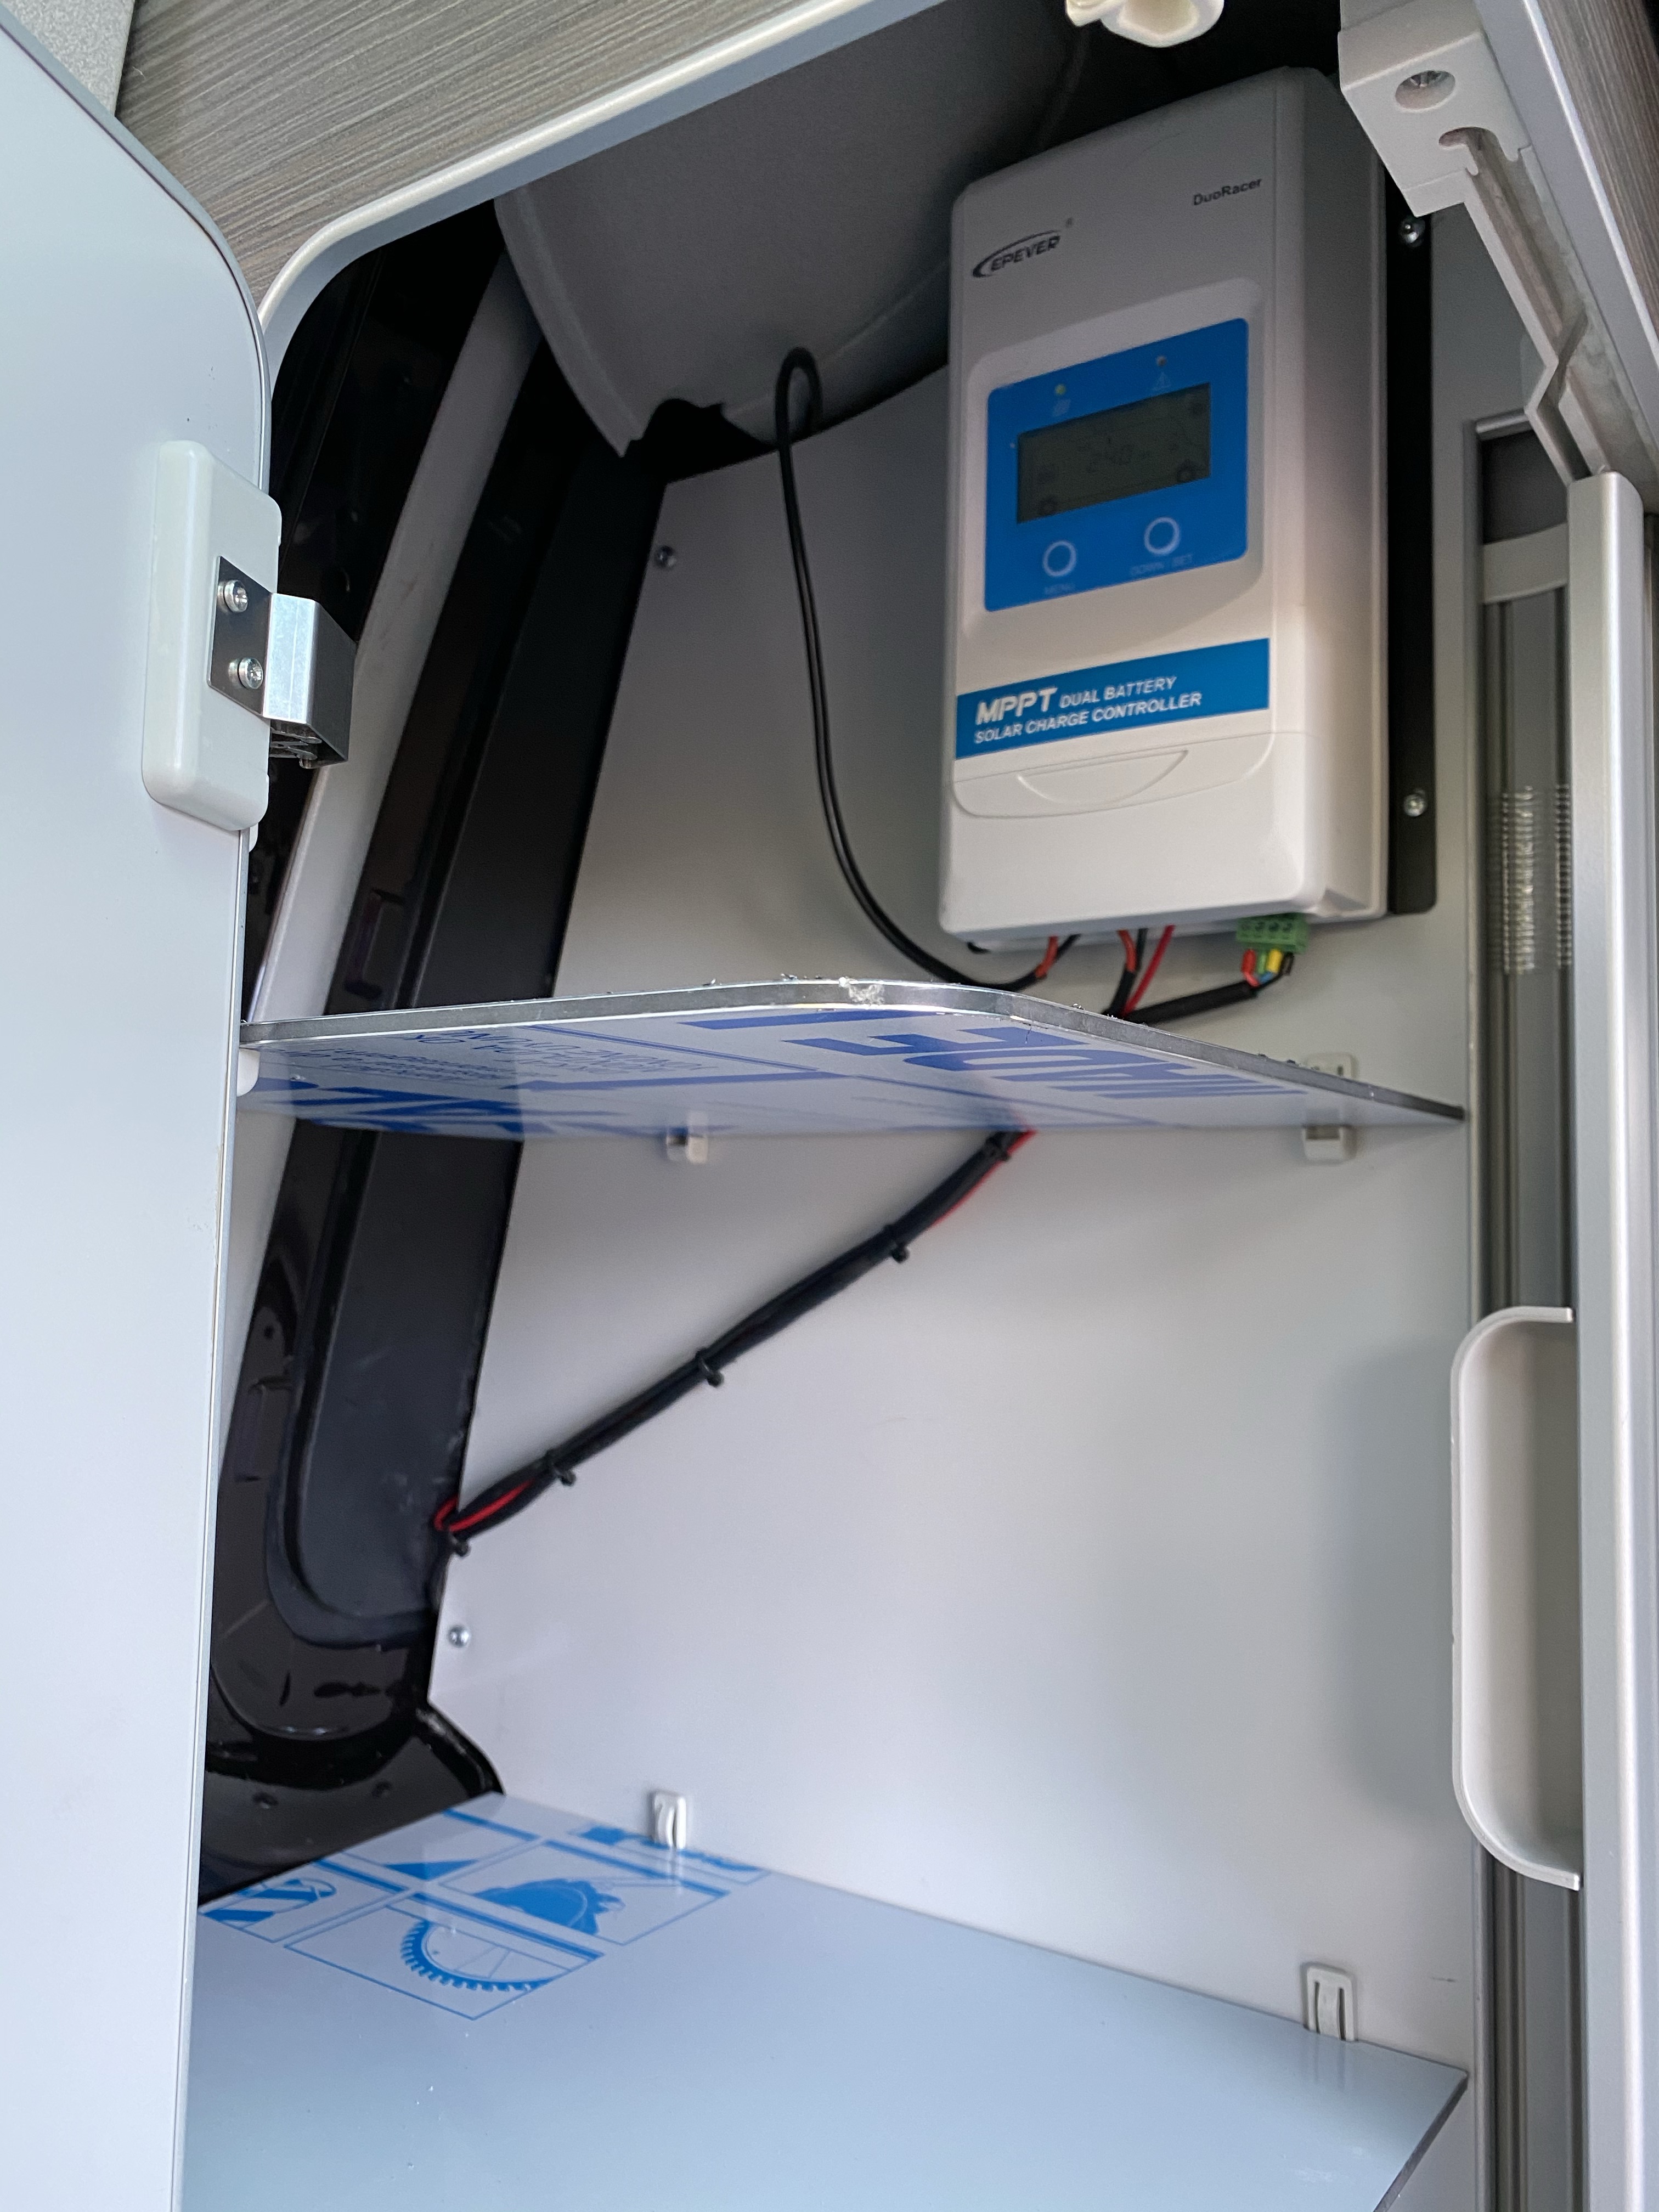
I chose a kit from solar camper solutions, because the owner Roger is a sponsor of the VW California Club forum and has a great reputation for customer service. The kit I chose comprised a single 120W panel, dual battery MPPT charge controller and an external display. I toyed with the idea of a Bluetooth-enabled charge controller, but in the end I decided that a simple display in the cabin would be less faff. To minimise the change in my “stock” interior, the display location is in the cabin, with the charge controller hidden in the rear wardrobe.
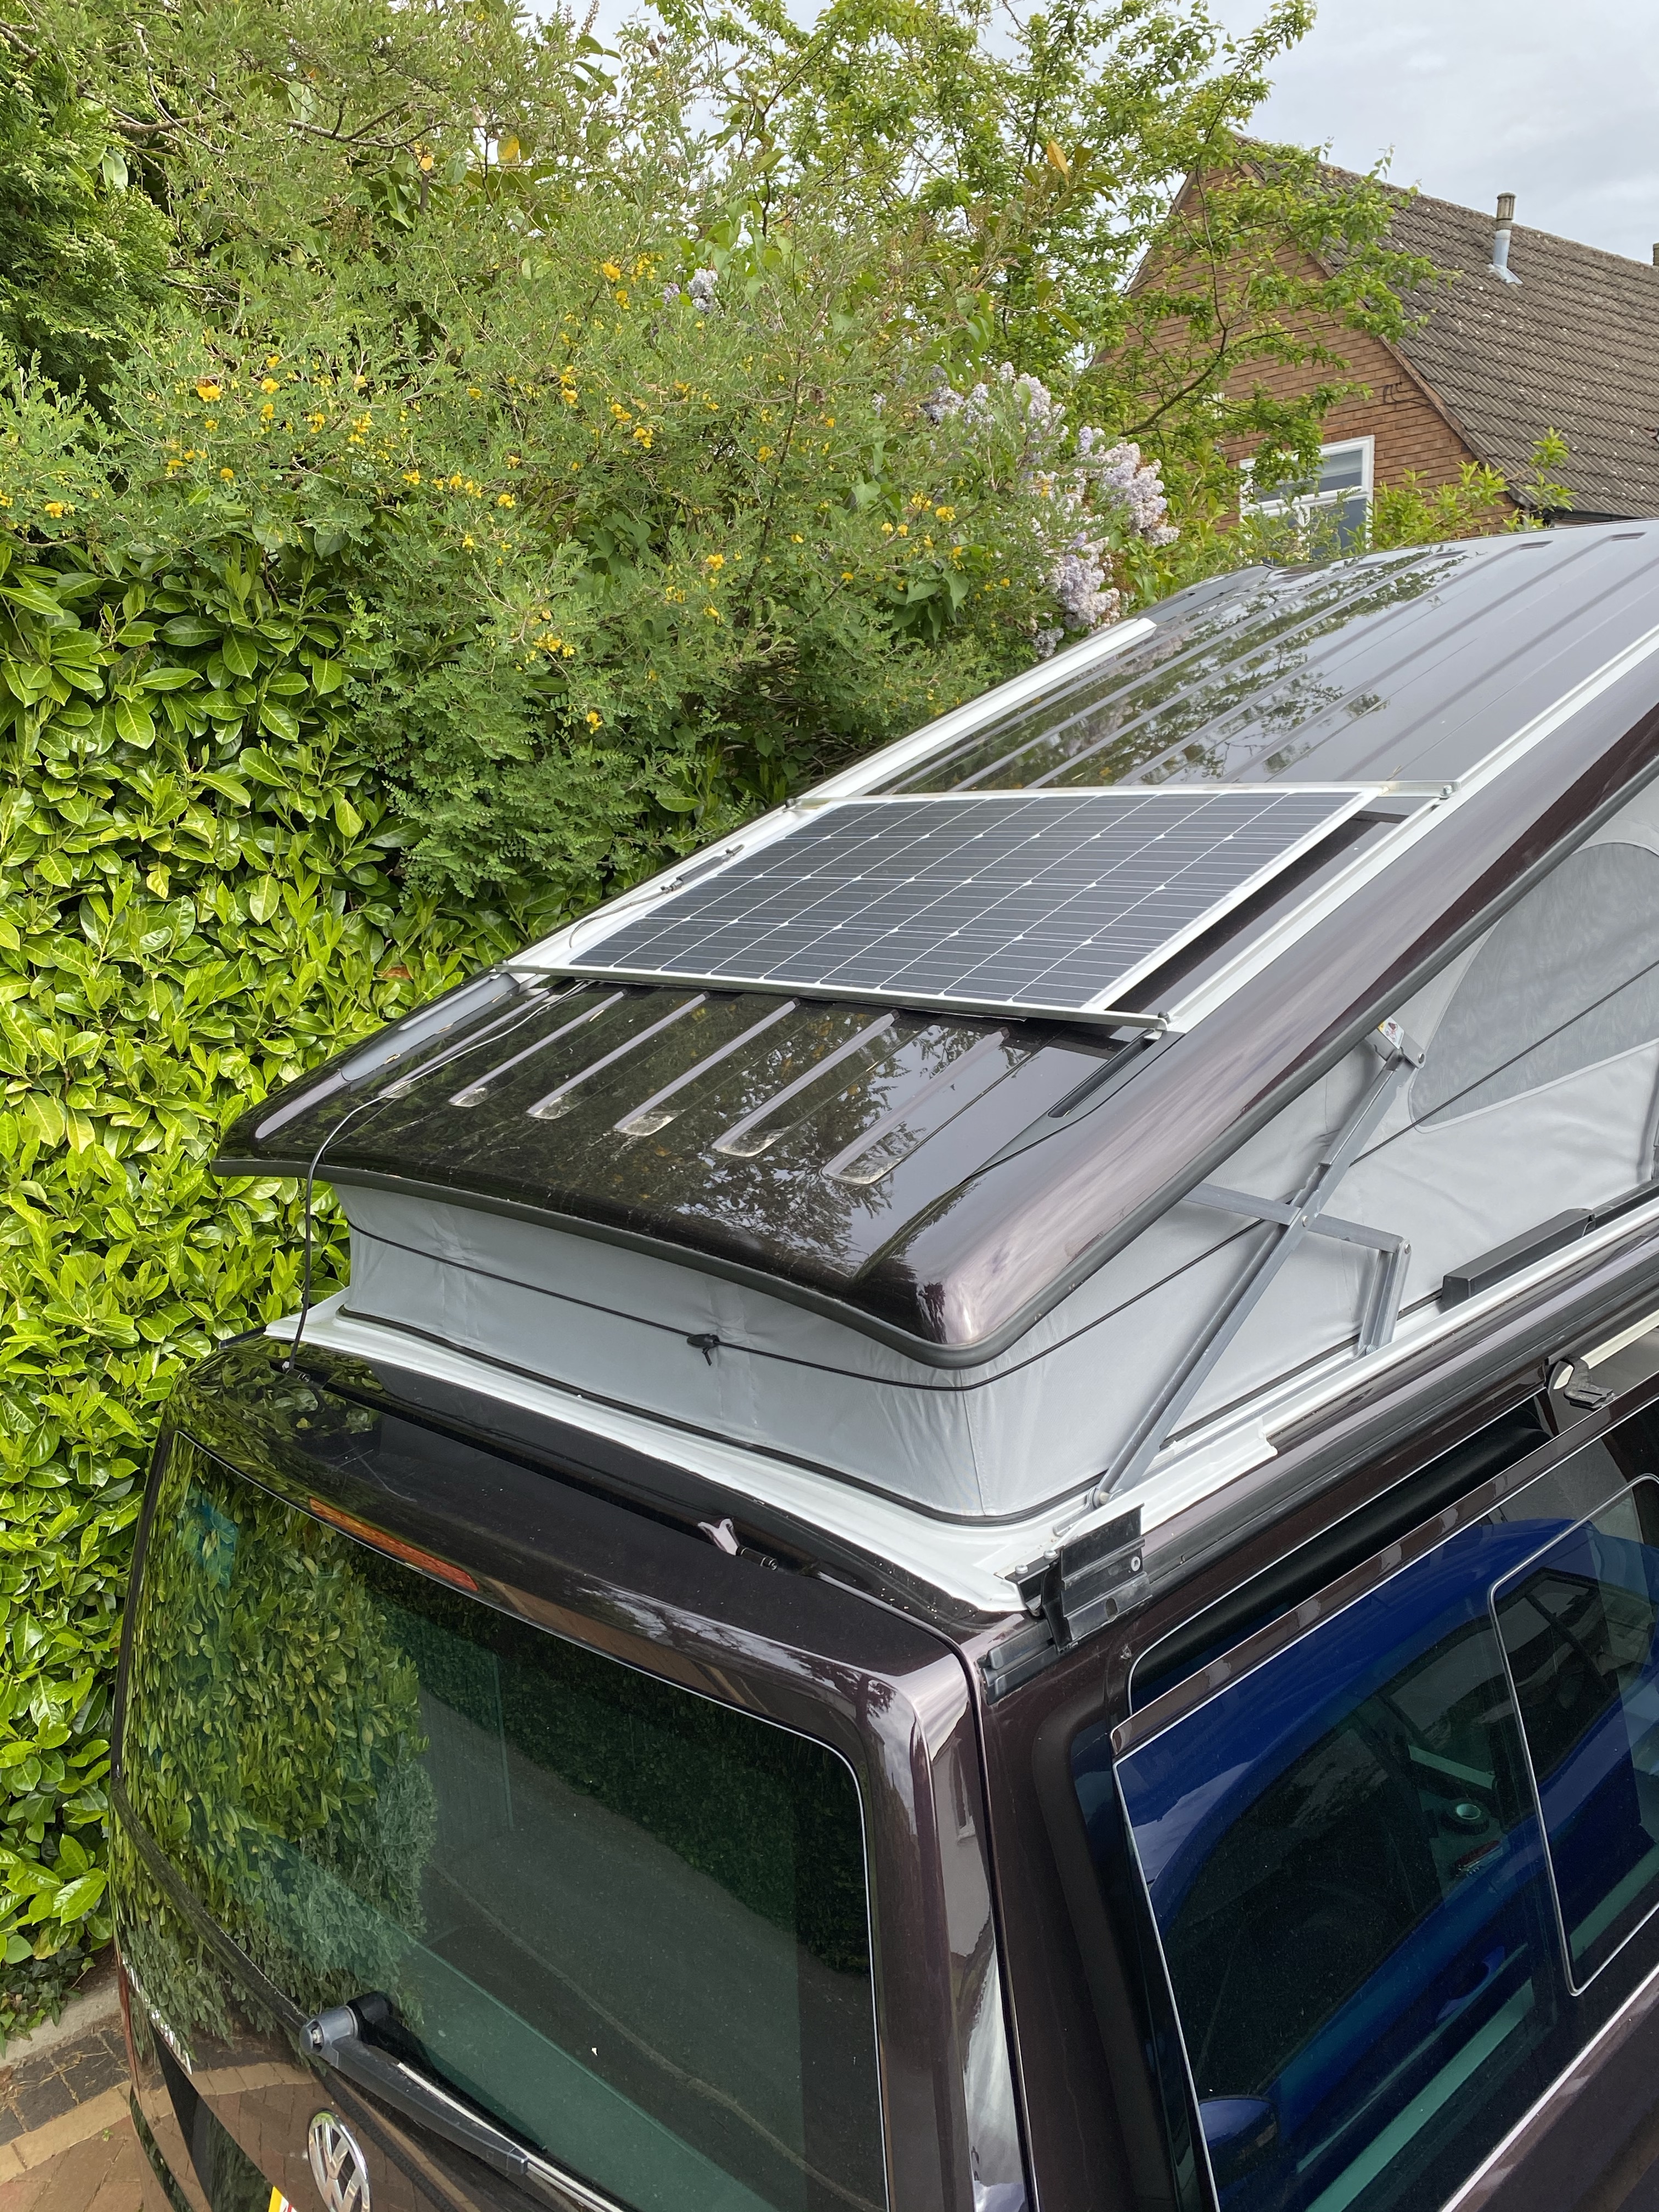
One of the benefits of this kit is that it attaches to the roof of the van using the roof rails and requires neither permanent direct attachment, nor a hole in the roof. It means that the panel is quickly removed if needed. The kit also comes with all the wires needed, precut to suitable lengths.
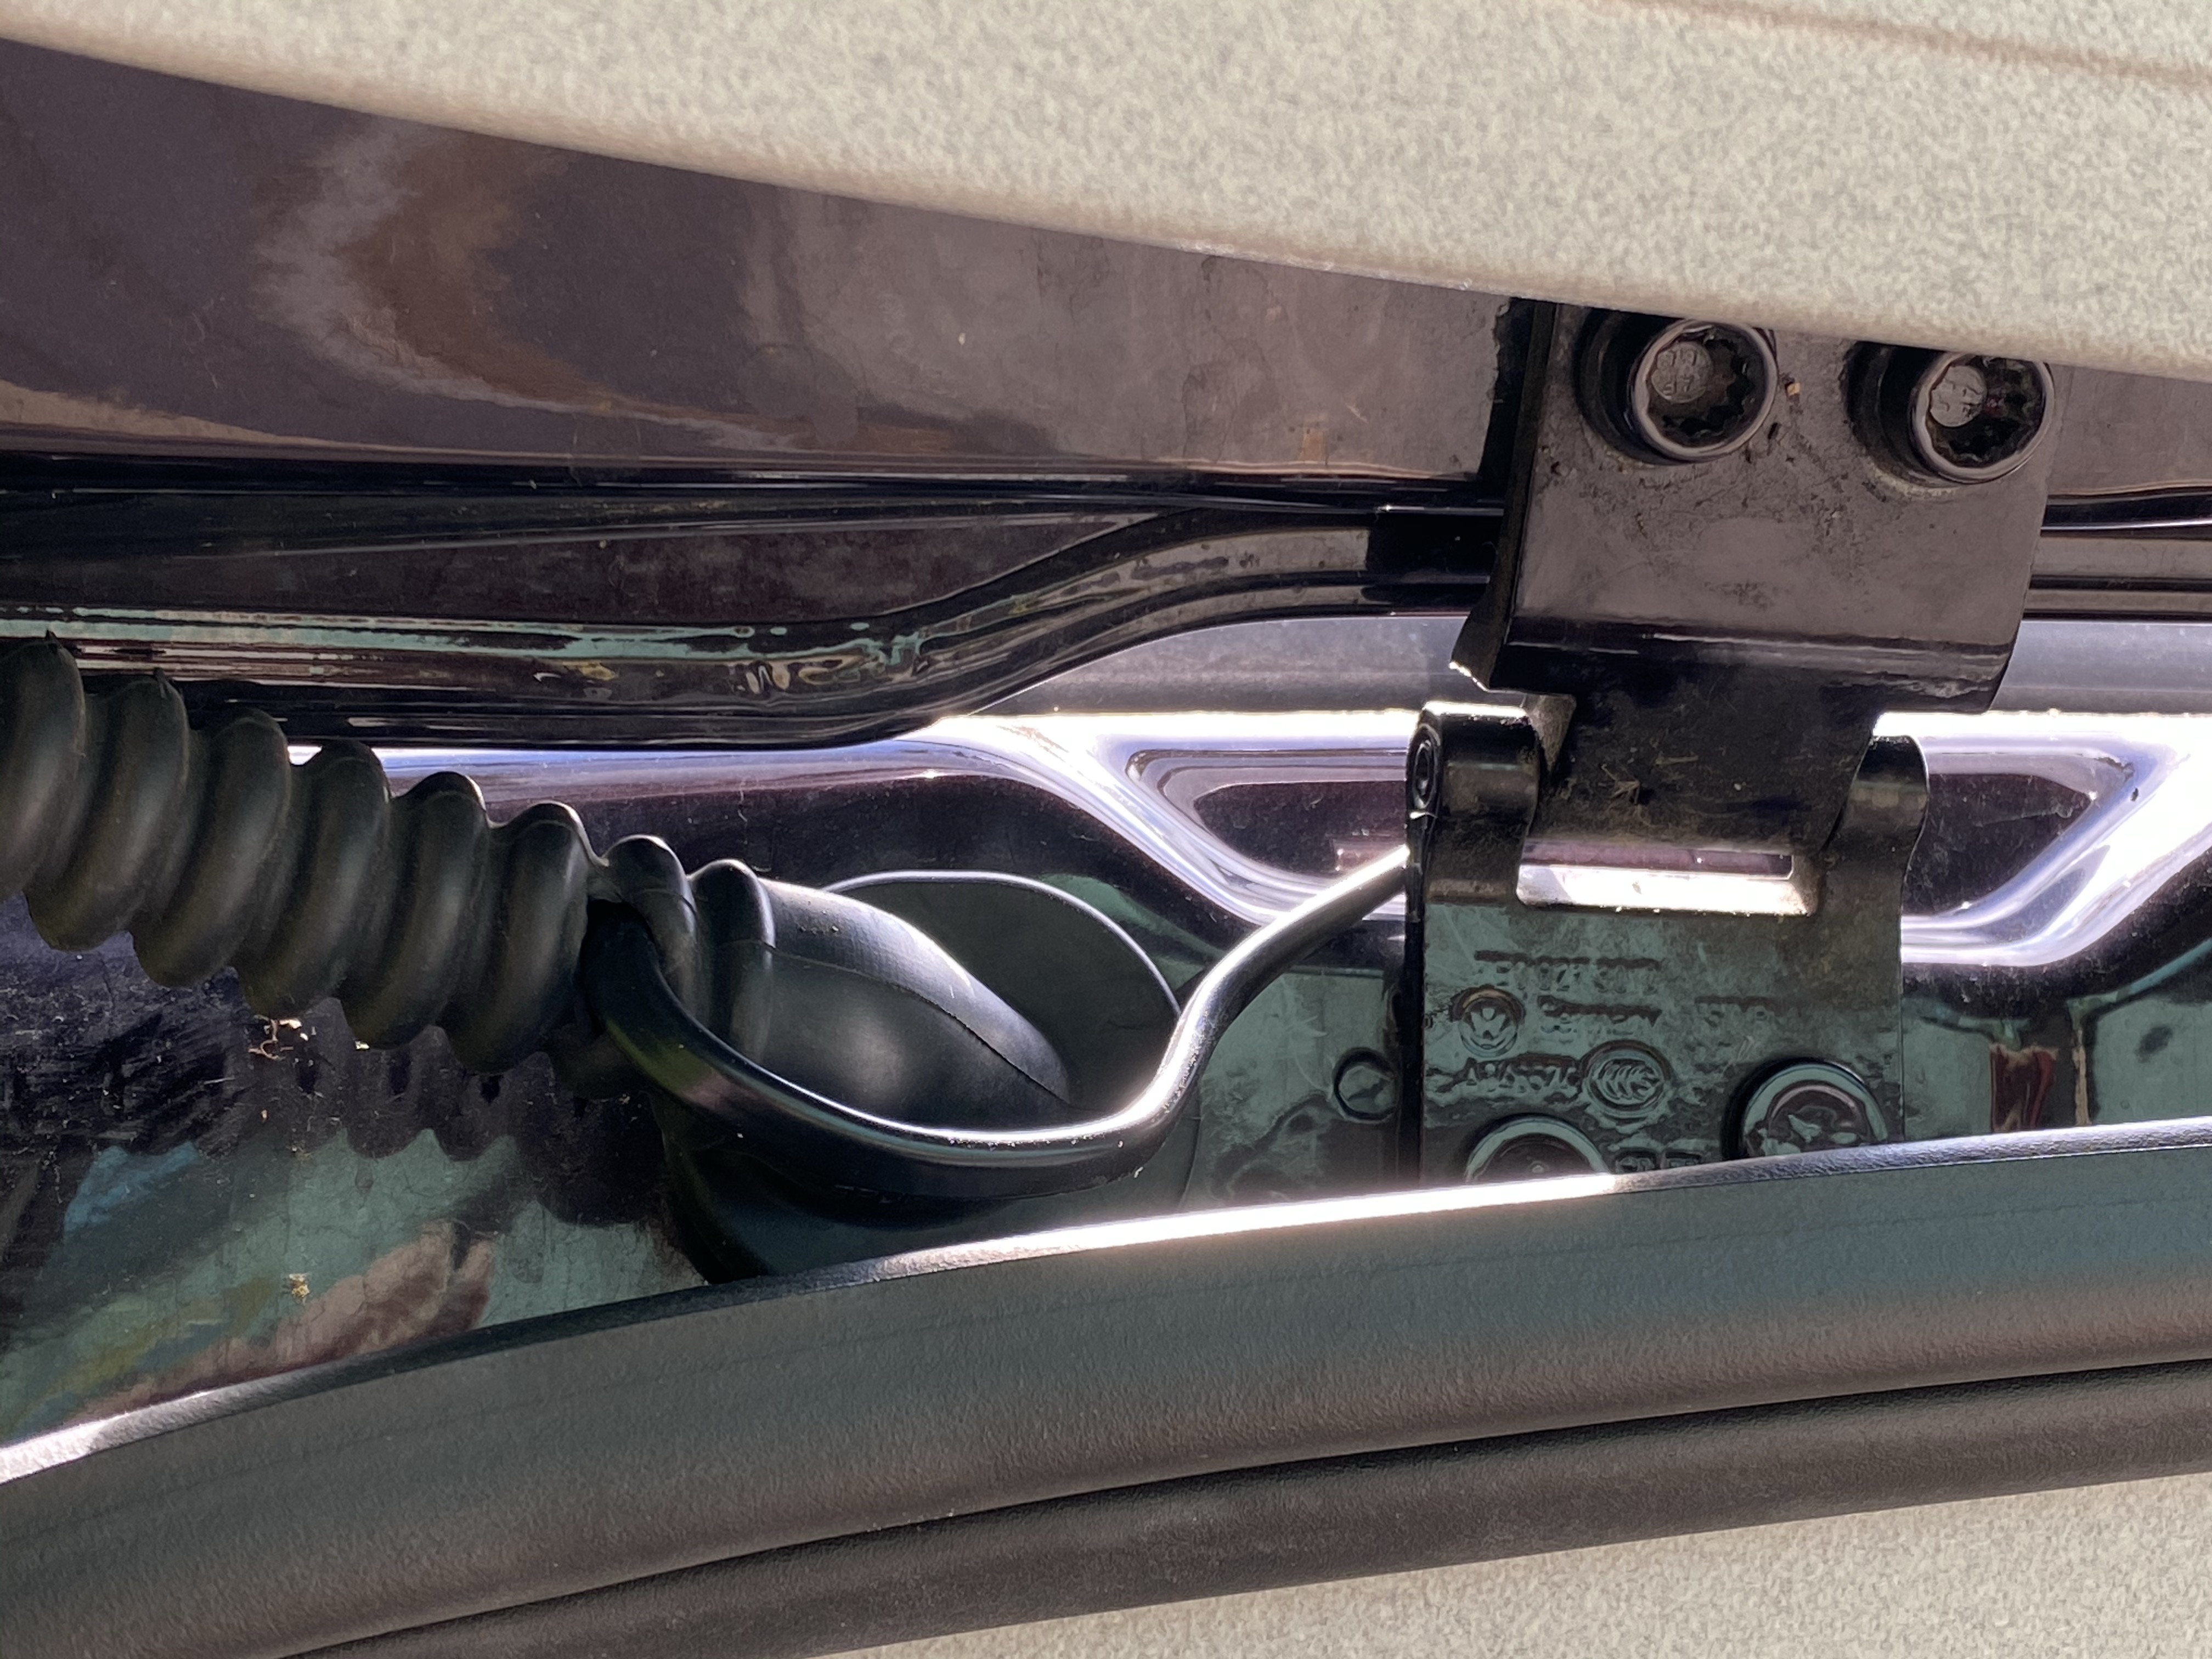
The first job was to secure the panel to the roof and then lead the cable into the van through the tailgate. There is plenty of space in the void near the hinge for cable to pass and I followed the excellent illustrated instructions, making a nick in the rubber gaiter to pass the cable into the wardrobe interior.
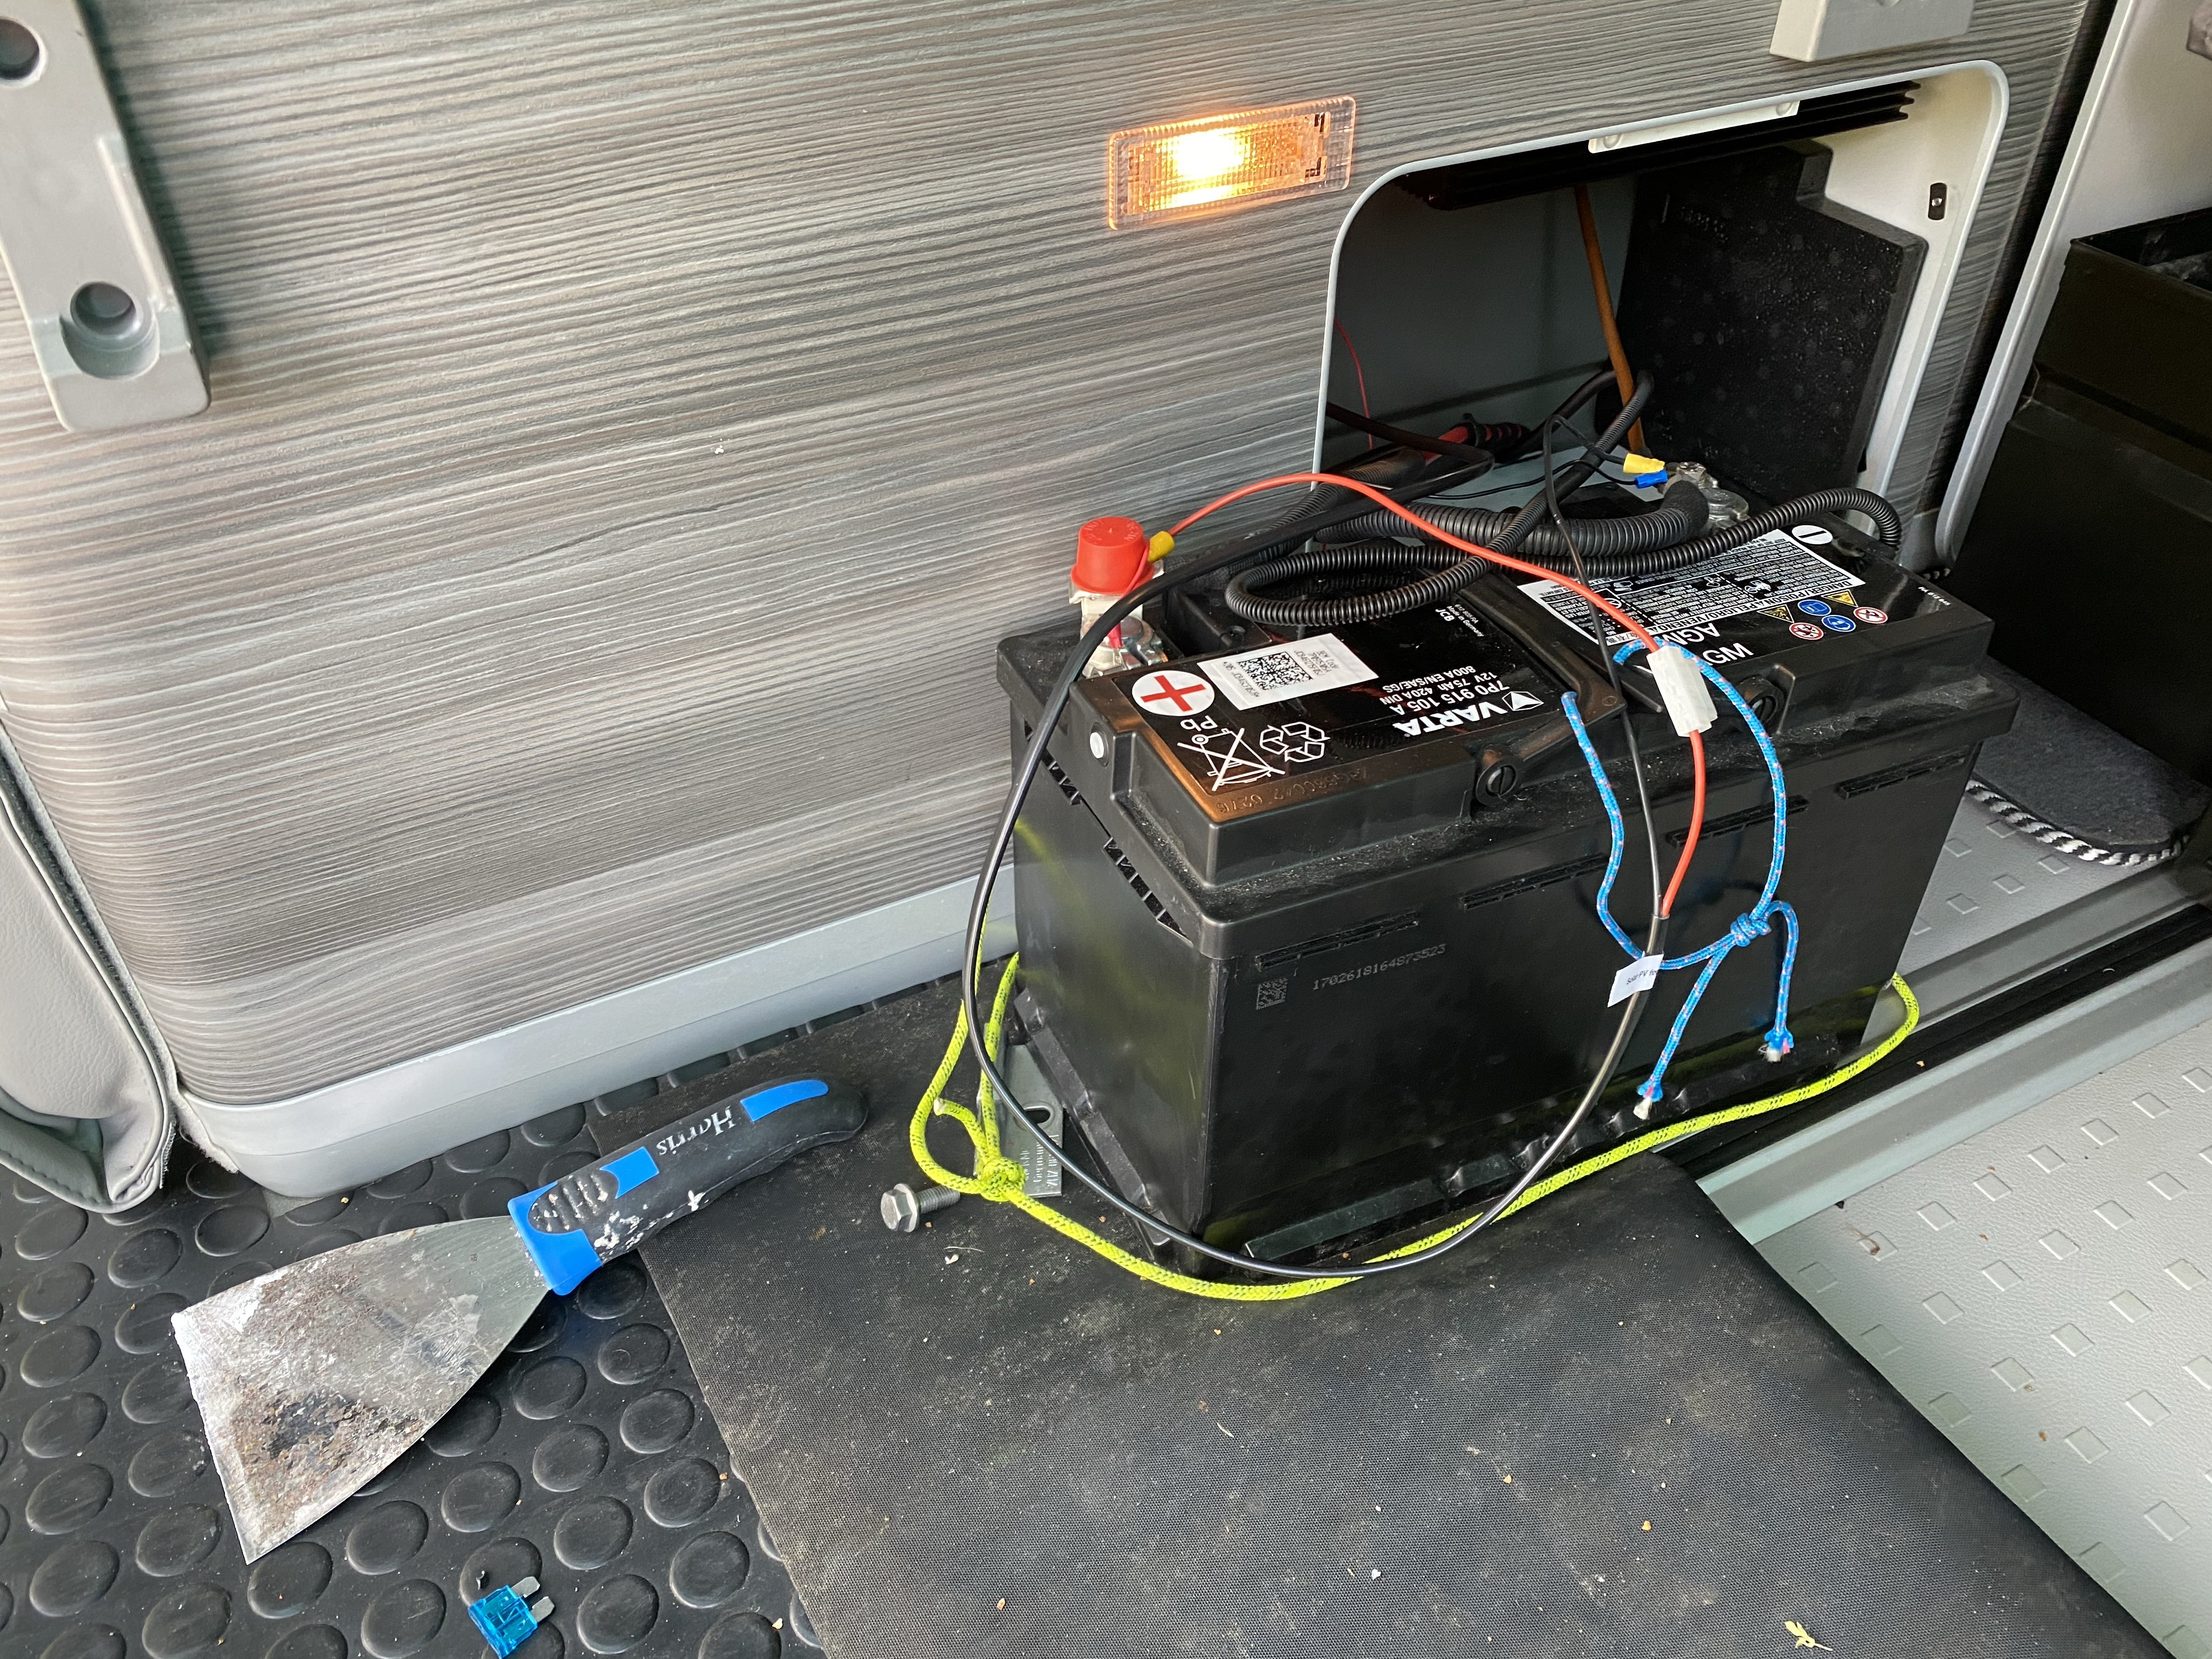
The next step was to bring a cable from the rear leisure battery up to the cupboard. It is only necessary to connect to one battery as the two leisure batteries are wired in parallel, so both will be charged by the solar panel. The connections were very straightforward, as the cables came pre-fitted with fuse holders and crimped ring connectors. The heavy battery is difficult to get out of its hidey hole, but last time I took the battery out, I tied some strong string round the battery, to give me something to pull on.
My kit included a dual charge controller, which allows charging of the vehicle battery, as well as the pair of leisure batteries. This means that if the van is left for any length of time, the vehicle battery is kept topped up. Whilst camping I have been very cautious about the vehicle battery and usually turn off the courtesy lights by the windscreen, never operate the radio or use the charging socket in the dash whilst off grid. I also never raise or lower the roof without engine running as the powerful motors for this run from the engine battery. This solar PV kit removes that concern; the charge controller trickles (up to) 1A into the vehicle battery, whilst the balance of the charge goes into the pair of leisure batteries.
There are several helpful posts on the VWCalifornia forum describing fitting these kits and I was a little concerned about the difficulty of routing a cable for the vehicle battery. I needn’t have worried!
The first thing I did was empty the cupboards and then remove the four bolts which hold the passenger seat in place. The seat can then be leaned on the dash, taking care over the cable for the heated seats.
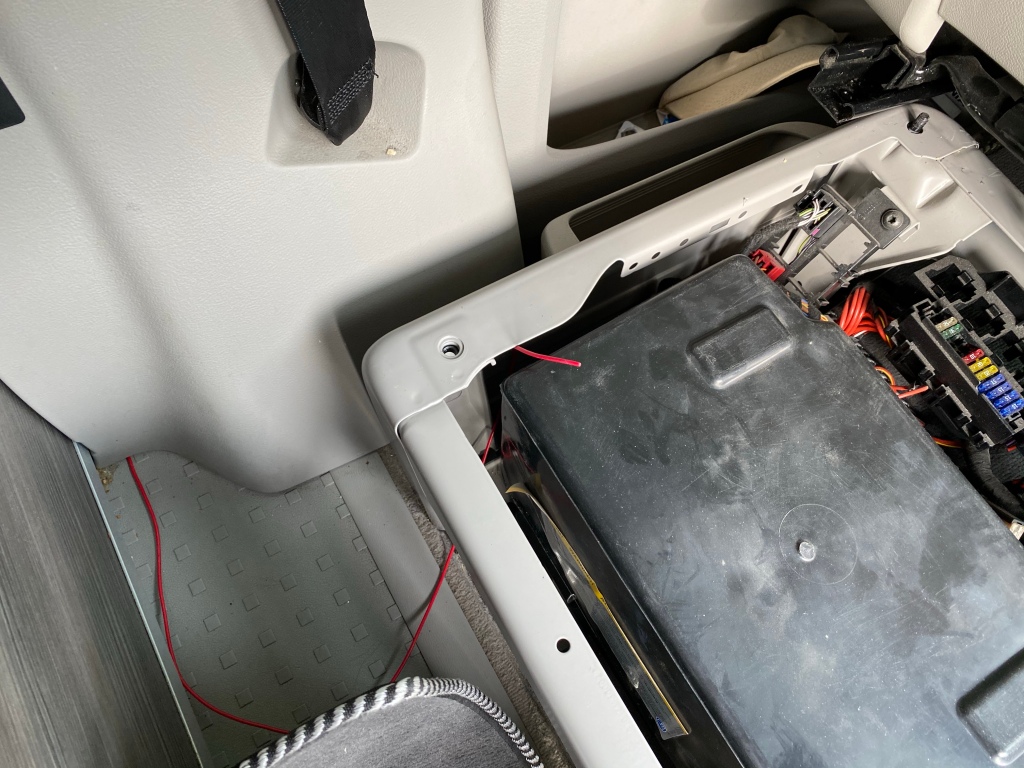
The most useful tool I used was a wire coat hanger, bent out straight. I used this step-by-step to lead a wire from the wardrobe, behind the fridge, along the top at the back of the kitchen cupboards and the down the side (see photo above – note the length of red cable at the bottom). It was then simple to bring the cable out at floor level, tuck it under the B-pillar trim and then take it to the seat base (see photo below). I disconnected the positive terminal on the vehicle battery and then made my connection to the relay under the seat, as described in the excellent instructions.
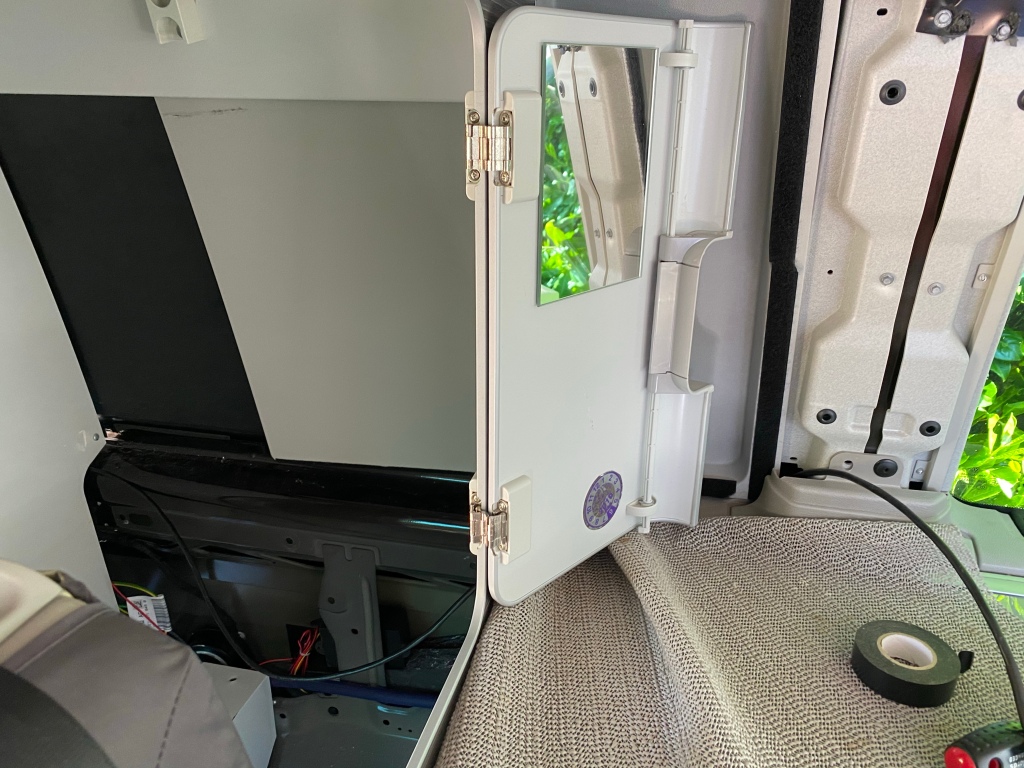
The final cable run was for the external display. This was to be fitted on the piece of trim above the cooker/fridge. That trim simply pulls off and the cable can be run across behind the fridge. I found that removing the plug holding the lower trim allowed more movement and easier access the to horizontal direction I needed to run the cable.
The cable provided by the manufacturer is only 1m and I was concerned about this rather short length, but was reassured by photos of successful installations, so I knew it was possible.
I removed the cream coloured fitting within the large wardrobe, revealing the track for the small sliding blind and a small gap behind. Fortunately, the bulky plug is easily removed from the cable, which makes passing it through a simple matter (see photo above). As usual, I took a photo of the cable before removing the connector, so I was sure the plug would be re-fitted correctly.
Using my trusty coat hanger, I led the cable just below the level of the fridge, into the big wardrobe and then into the rear wardrobe, where it makes its connection to the charge controller.
So far, I have not modified any of the stock fittings in my Cali, but now was time to take a deep breath and cut a large hole in the trim to take the display. I had a hole cutter designed for making apertures for ceiling lights and this made short work of the soft plastic. Sadly, it was not quite large enough for the display, so I used a hacksaw blade to removed a couple mm around and then finished with a file. This gave a very neat fit for the display.
It was then a case of connecting the battery wires to the charge controller, fitting the fuse to the vehicle battery connection, then the fuse for the leisure battery connection and finally the feed from the panel.
Overall I am very pleased with the install. Cosmetically, it could be more attractive, but I definitely wanted a panel which could be removed and the panel is barely noticeable when the roof is down. The aluminium frame is very strong and will prevent any vibration at motorway speed. The components could have been bought separately, but I bet it would not save any money and I have the reassurance of knowing there was someone to ask for technical support during the installation and the quality of the kit is excellent.
The output from the panel drops markedly on a cloudy day and is also strongly affected by the angle to the sun. However, in warmer weather, there should be plenty of energy from the sun for me to run the fridge full time, as well as charging all out gadgets. Time will tell…


 Fitting a solar panel is something I’d been thinking about ever since we bought the van. On one hand, it would be handy to run the fridge continuously without worry whilst off-grid. On the other, the two leisure batteries in the Cali seem to cope most of the time, because we often drive each day. However, during lockdown I got really bored and wanted a project on the van to keep me busy for a little while (I spent much longer on this project than I needed to!).