 Fitting a solar panel is something I’d been thinking about ever since we bought the van. On one hand, it would be handy to run the fridge continuously without worry whilst off-grid. On the other, the two leisure batteries in the Cali seem to cope most of the time, because we often drive each day. However, during lockdown I got really bored and wanted a project on the van to keep me busy for a little while (I spent much longer on this project than I needed to!).
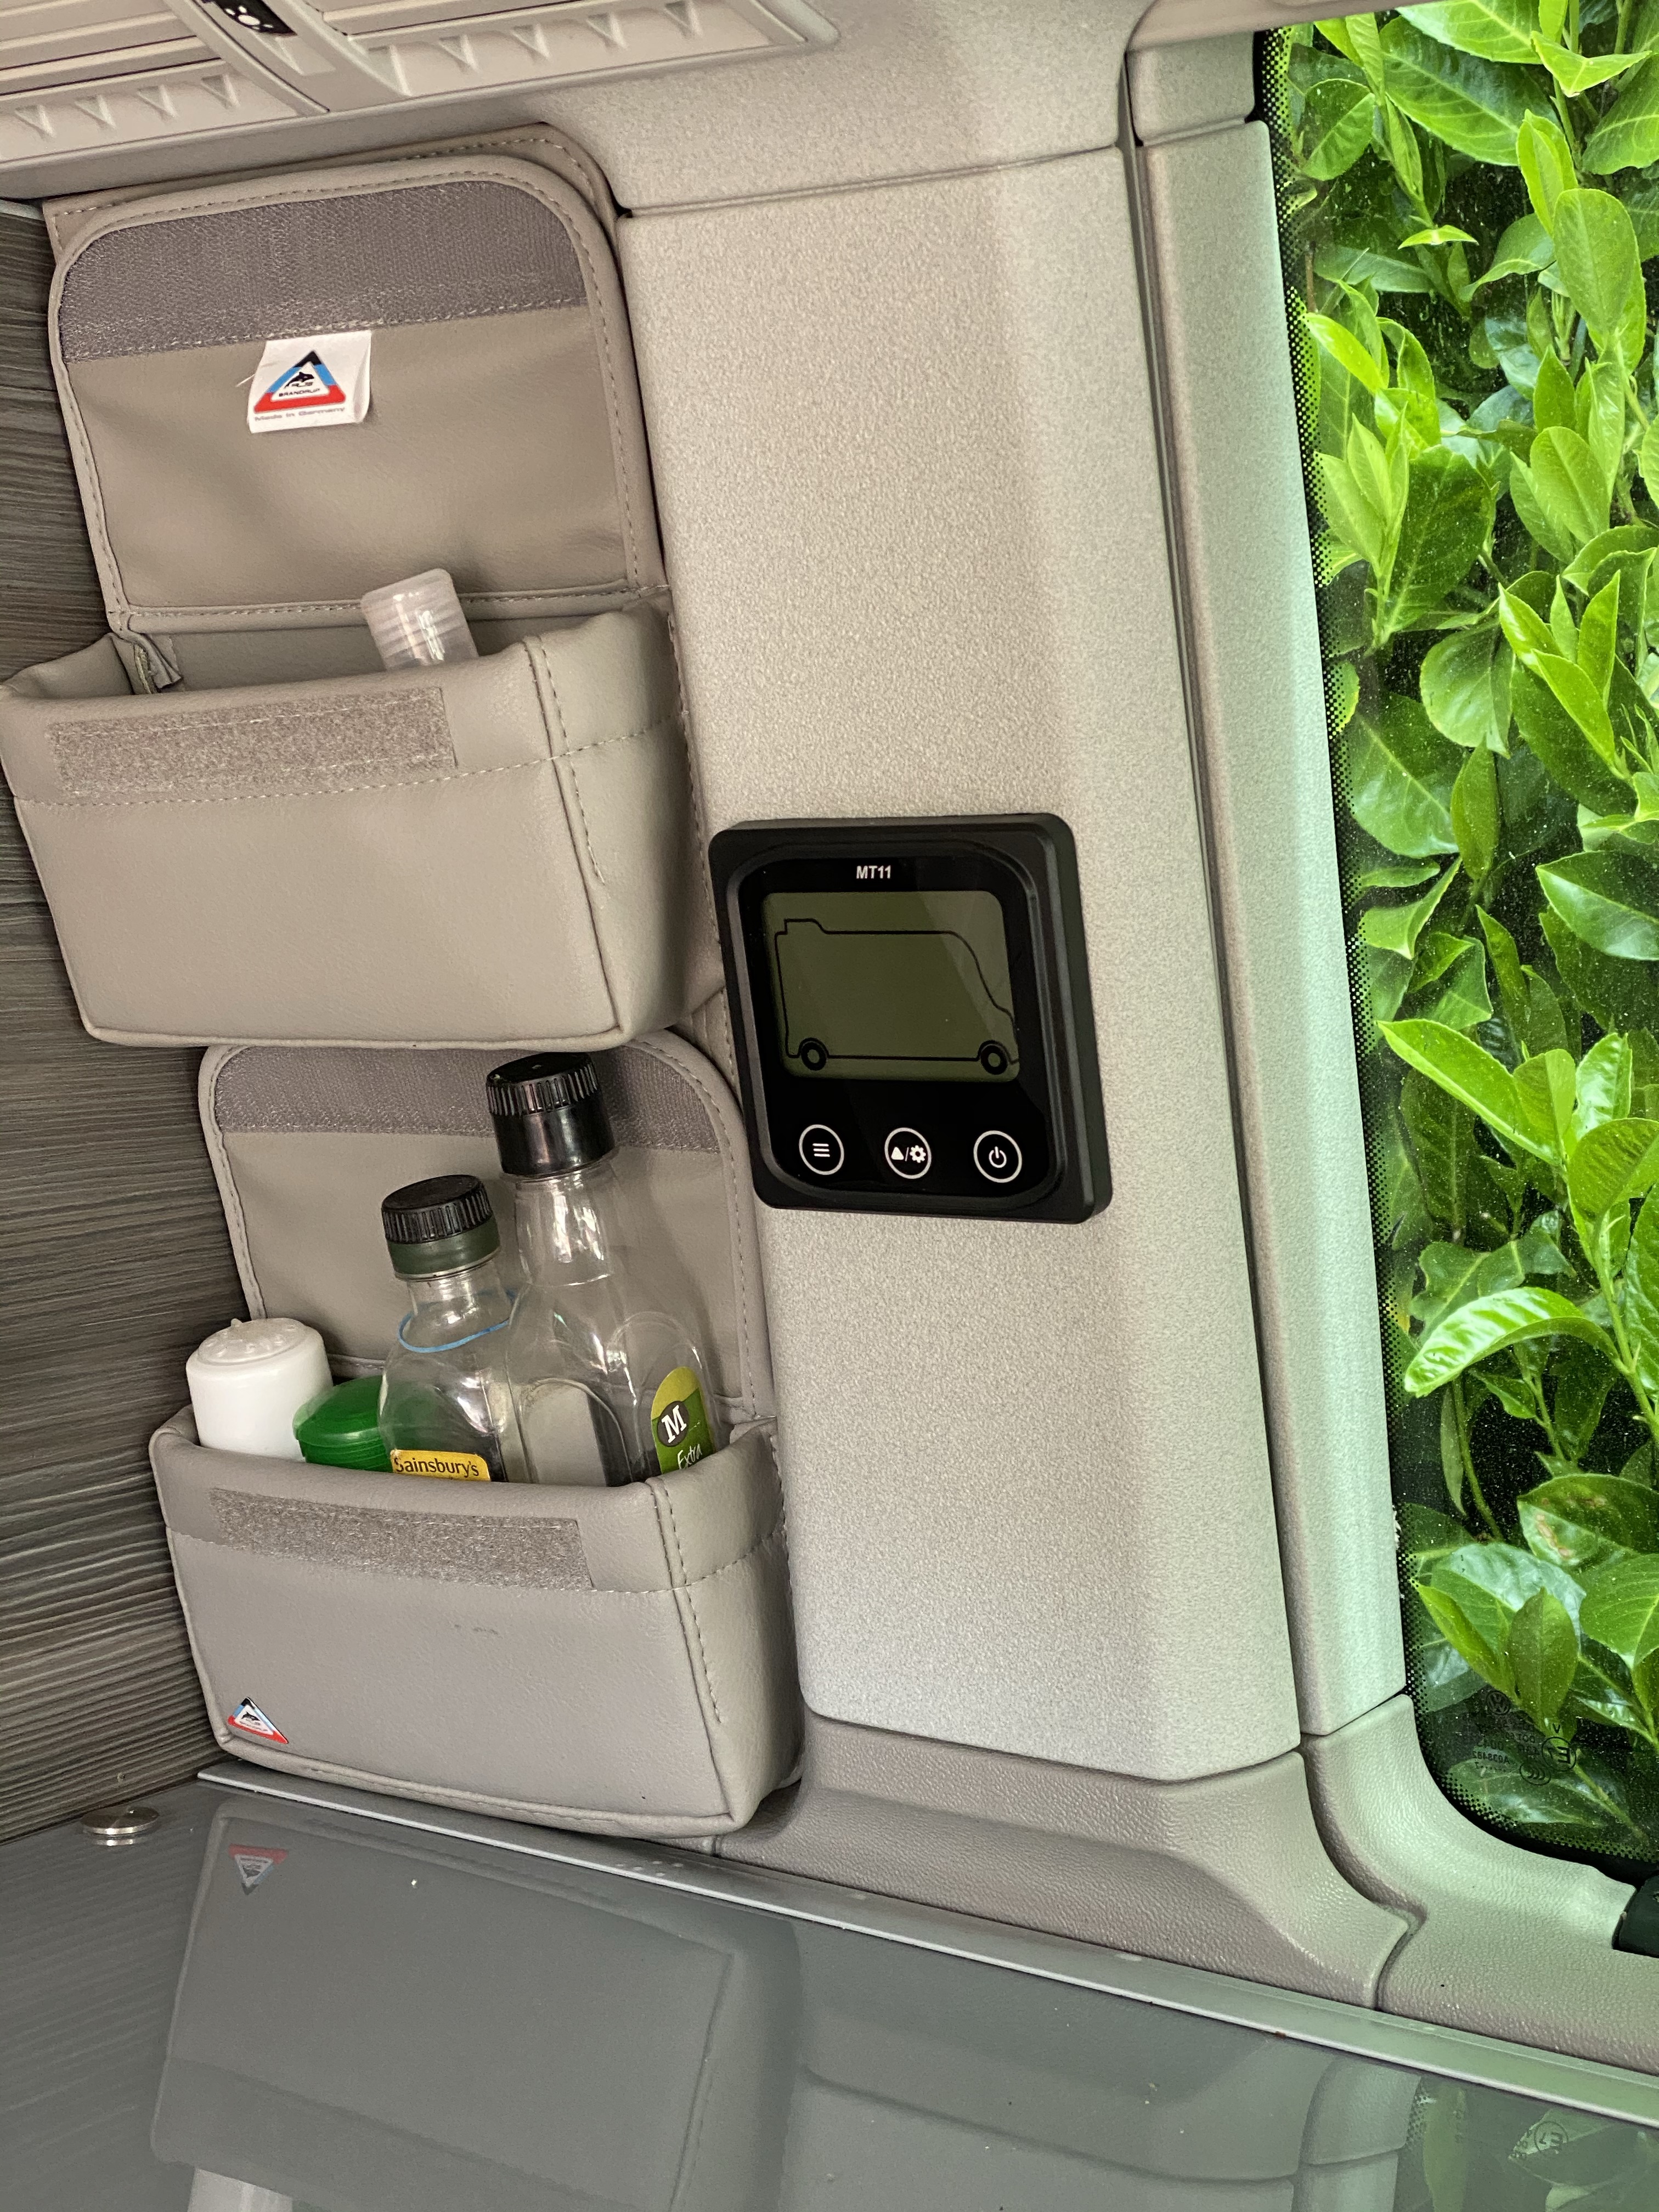
I chose a kit from solar camper solutions, because the owner Roger is a sponsor of the VW California Club forum and has a great reputation for customer service. The kit I chose comprised a single 120W panel, dual battery MPPT charge controller and an external display. I toyed with the idea of a Bluetooth-enabled charge controller, but in the end I decided that a simple display in the cabin would be less faff. To minimise the change in my “stock” interior, the display location is in the cabin, with the charge controller hidden in the rear wardrobe.
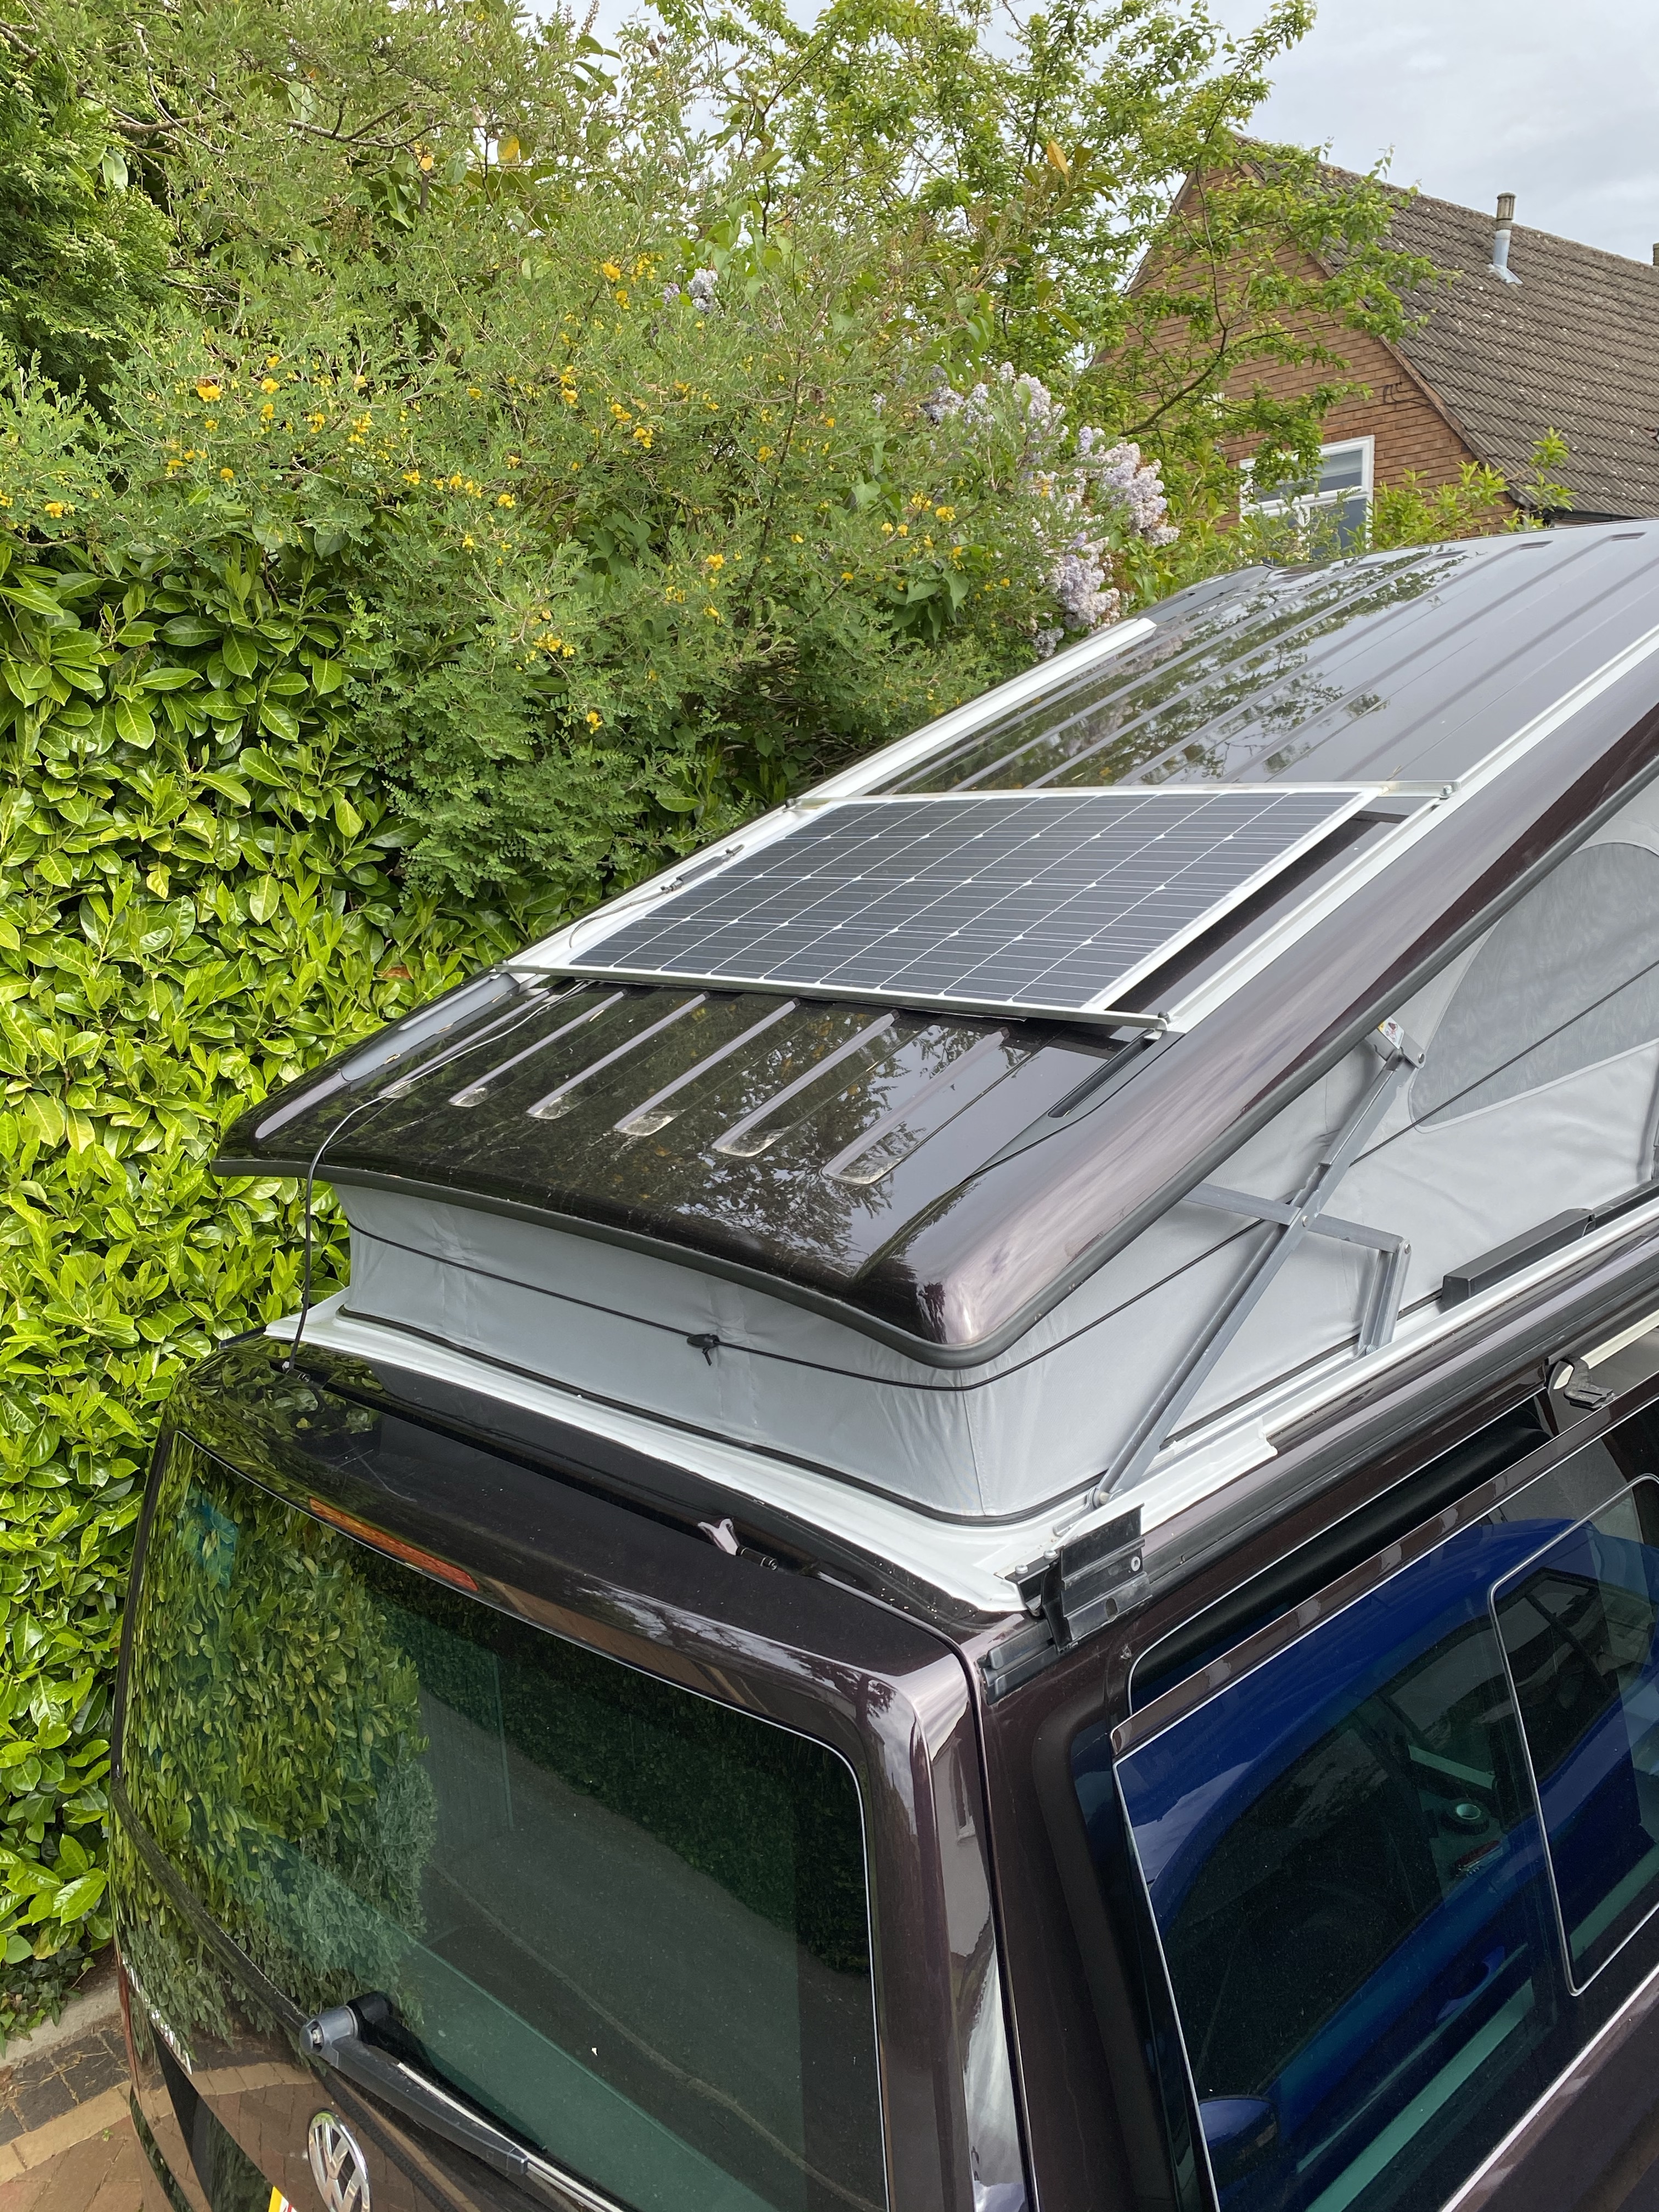
One of the benefits of this kit is that it attaches to the roof of the van using the roof rails and requires neither permanent direct attachment, nor a hole in the roof. It means that the panel is quickly removed if needed. The kit also comes with all the wires needed, precut to suitable lengths.

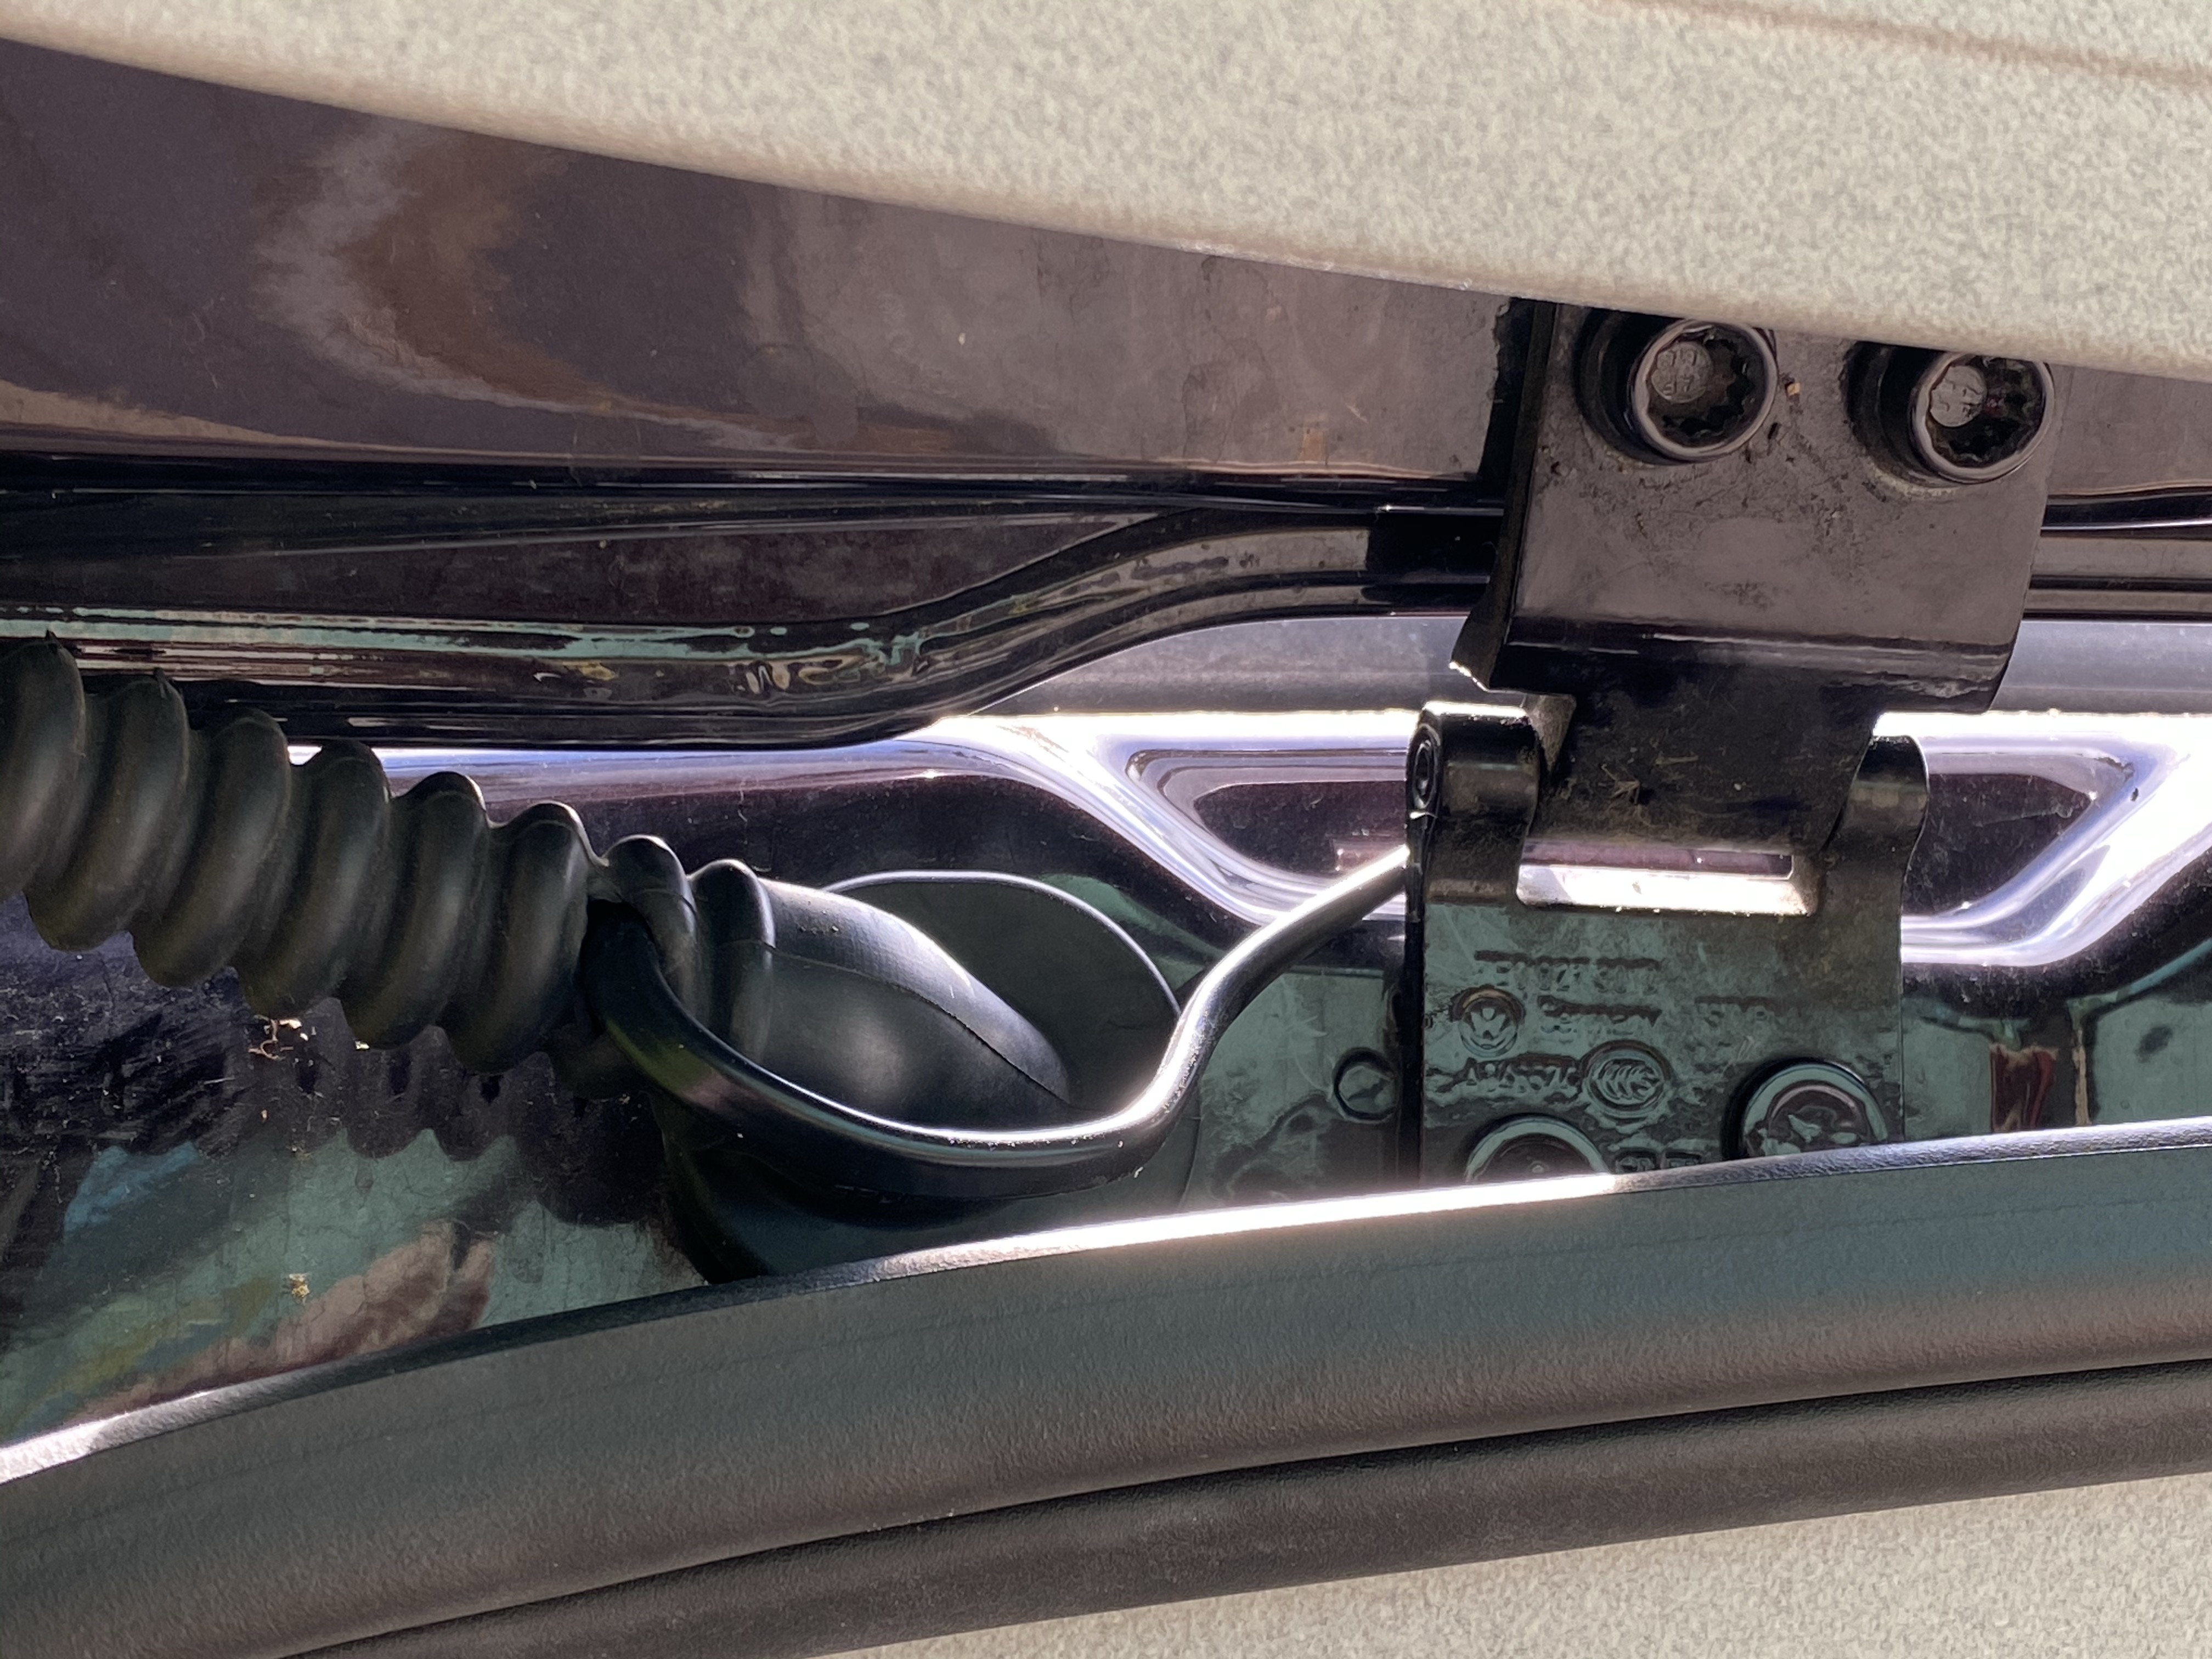
The first job was to secure the panel to the roof and then lead the cable into the van through the tailgate. There is plenty of space in the void near the hinge for cable to pass and I followed the excellent illustrated instructions, making a nick in the rubber gaiter to pass the cable into the wardrobe interior.
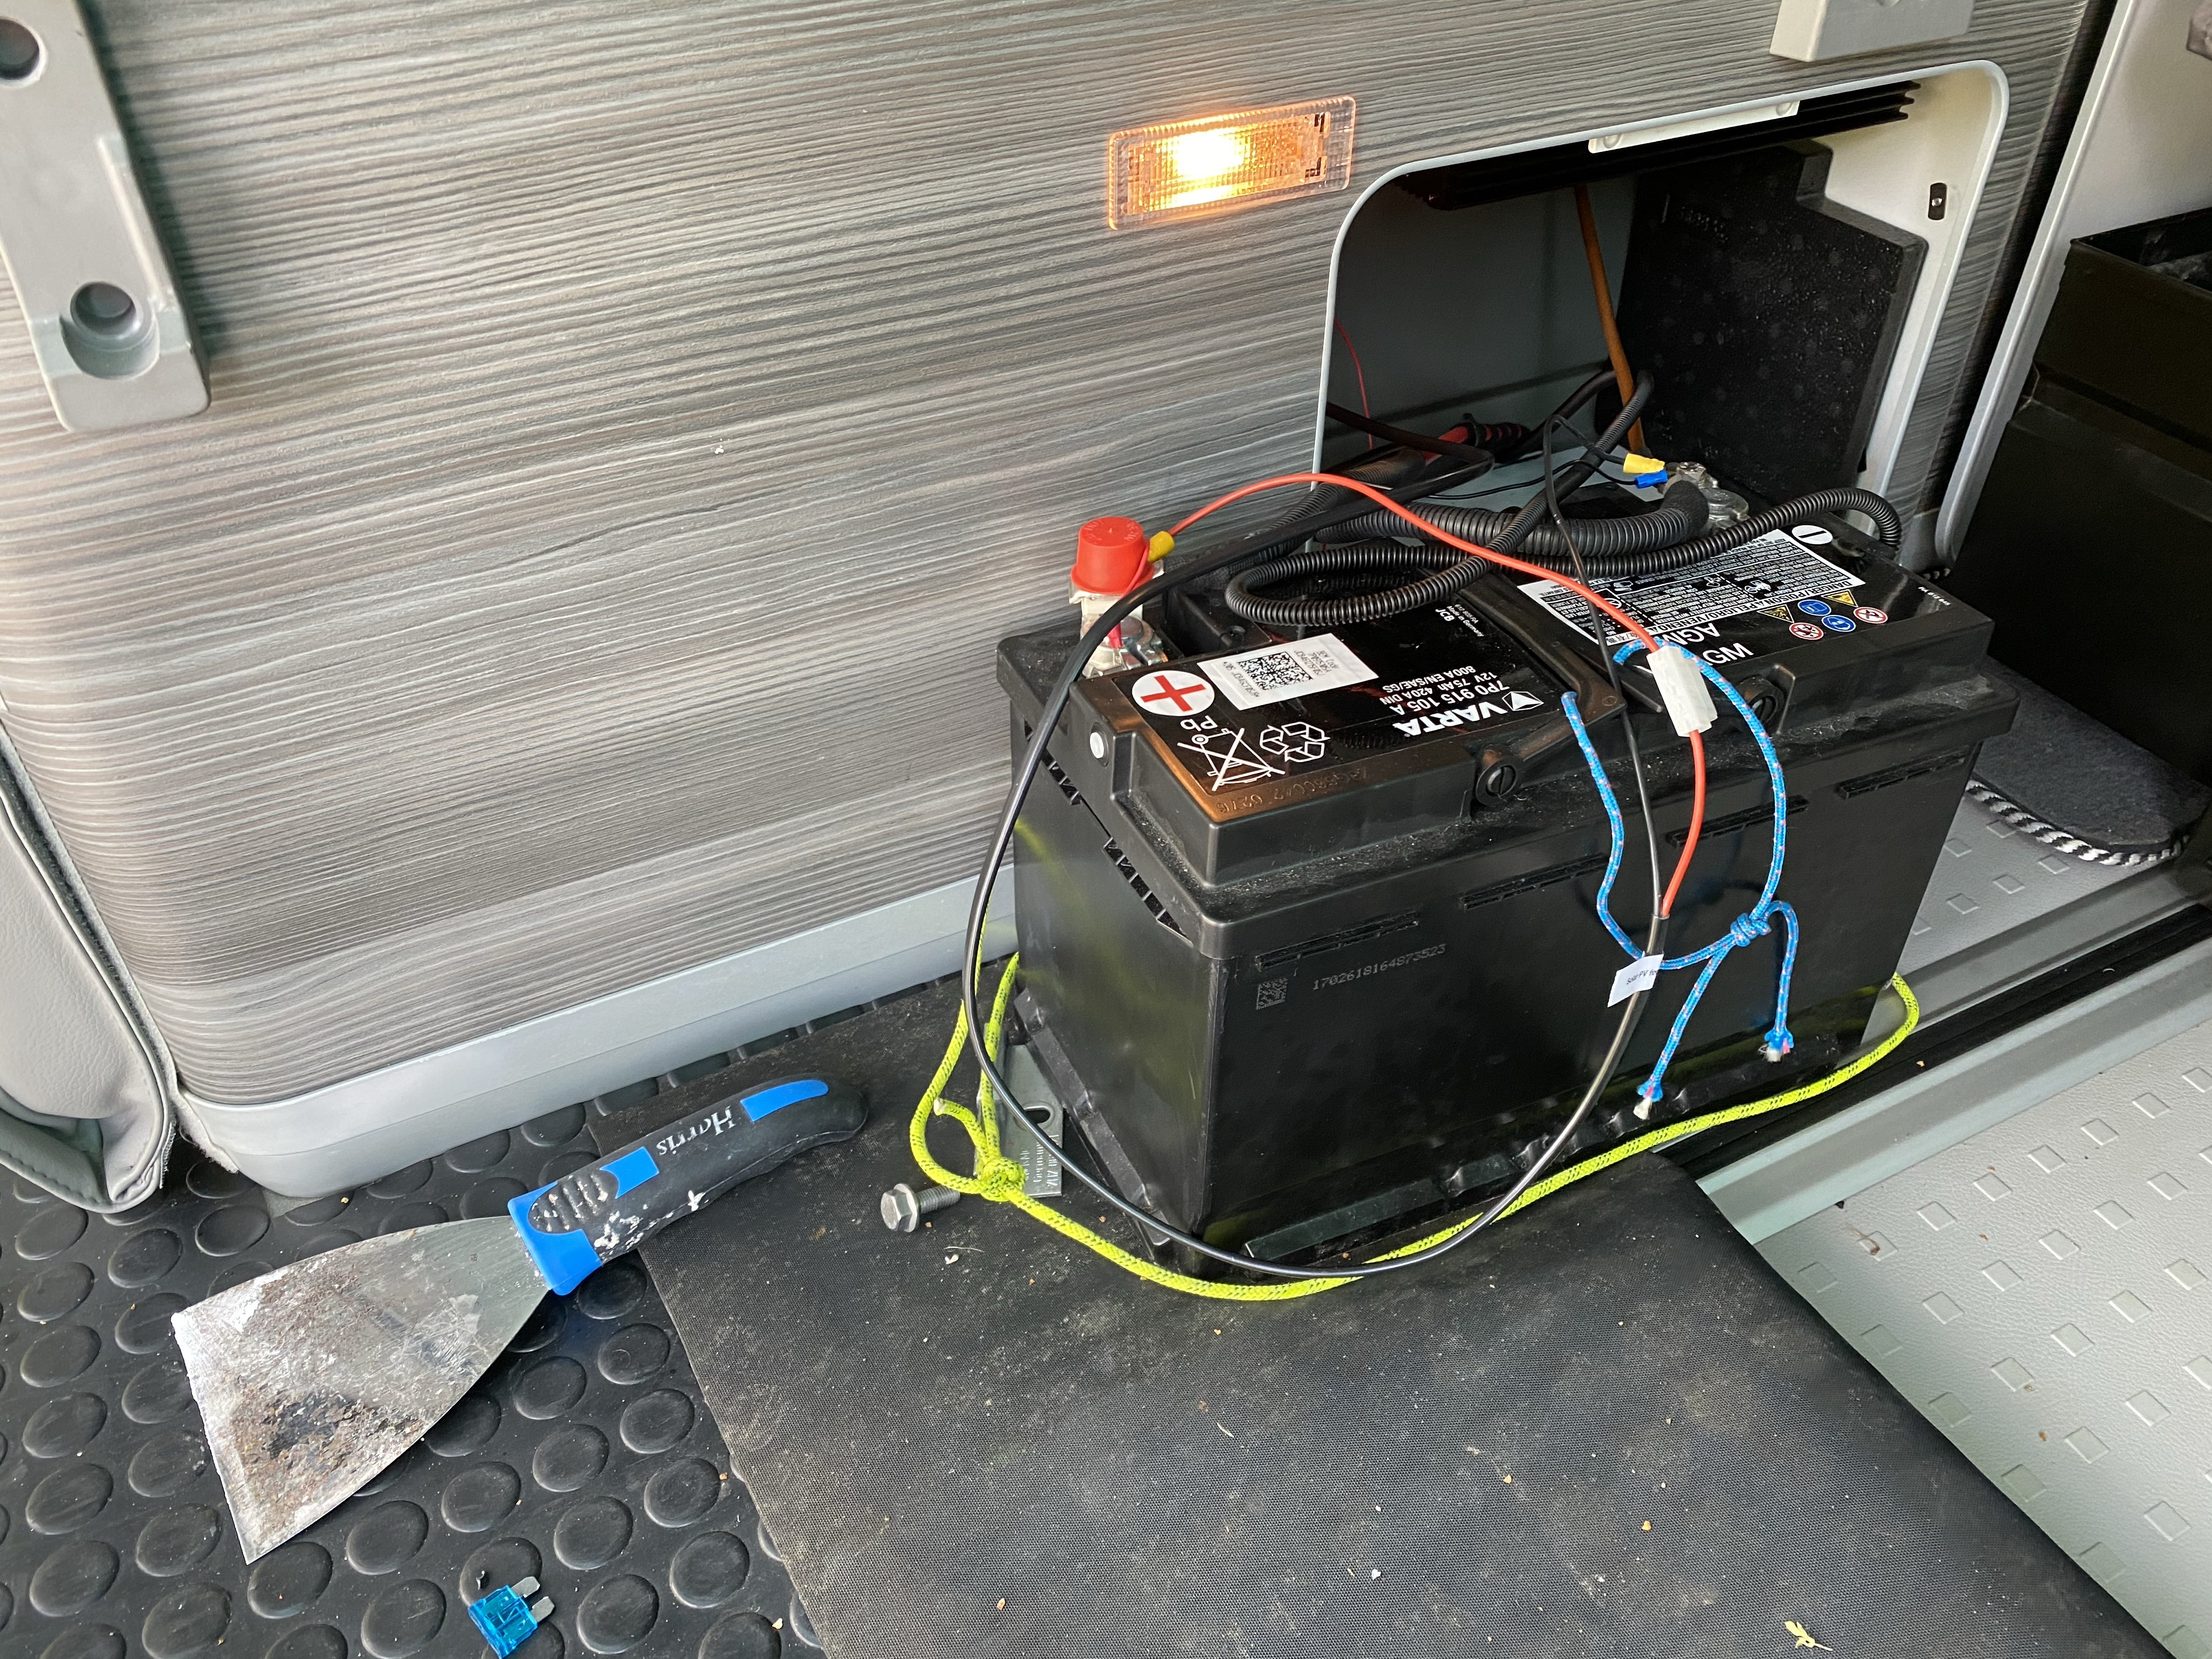
The next step was to bring a cable from the rear leisure battery up to the cupboard. It is only necessary to connect to one battery as the two leisure batteries are wired in parallel, so both will be charged by the solar panel. The connections were very straightforward, as the cables came pre-fitted with fuse holders and crimped ring connectors. The heavy battery is difficult to get out of its hidey hole, but last time I took the battery out, I tied some strong string round the battery, to give me something to pull on.
My kit included a dual charge controller, which allows charging of the vehicle battery, as well as the pair of leisure batteries. This means that if the van is left for any length of time, the vehicle battery is kept topped up. Whilst camping I have been very cautious about the vehicle battery and usually turn off the courtesy lights by the windscreen, never operate the radio or use the charging socket in the dash whilst off grid. I also never raise or lower the roof without engine running as the powerful motors for this run from the engine battery. This solar PV kit removes that concern; the charge controller trickles (up to) 1A into the vehicle battery, whilst the balance of the charge goes into the pair of leisure batteries.
There are several helpful posts on the VWCalifornia forum describing fitting these kits and I was a little concerned about the difficulty of routing a cable for the vehicle battery. I needn’t have worried!

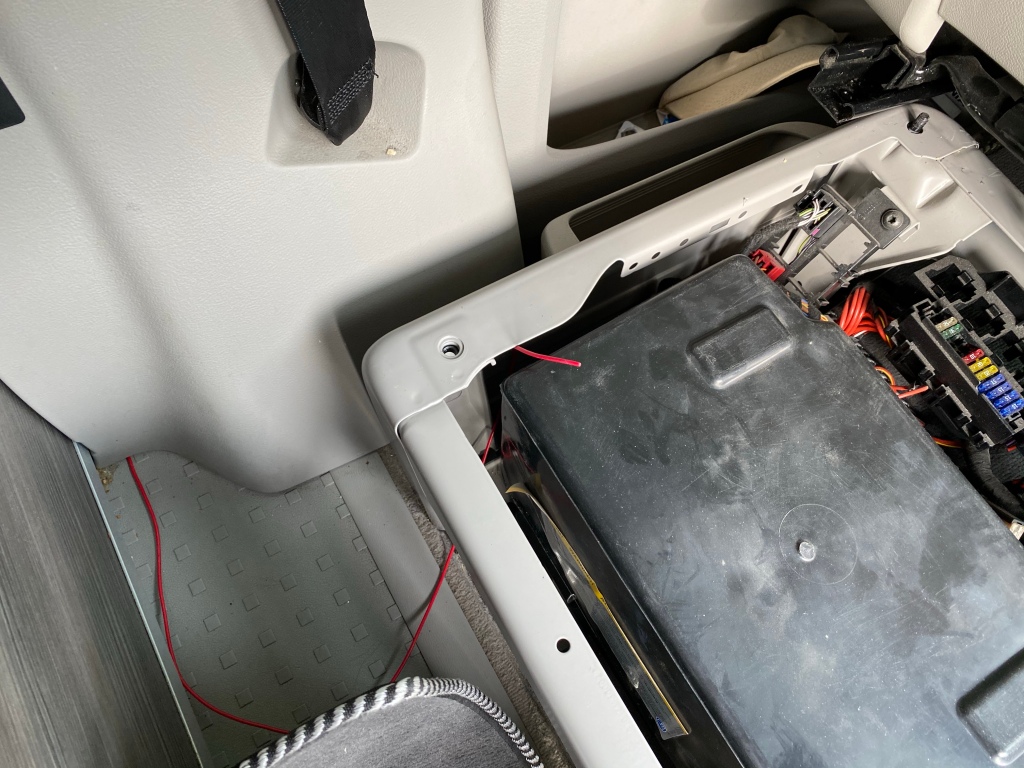
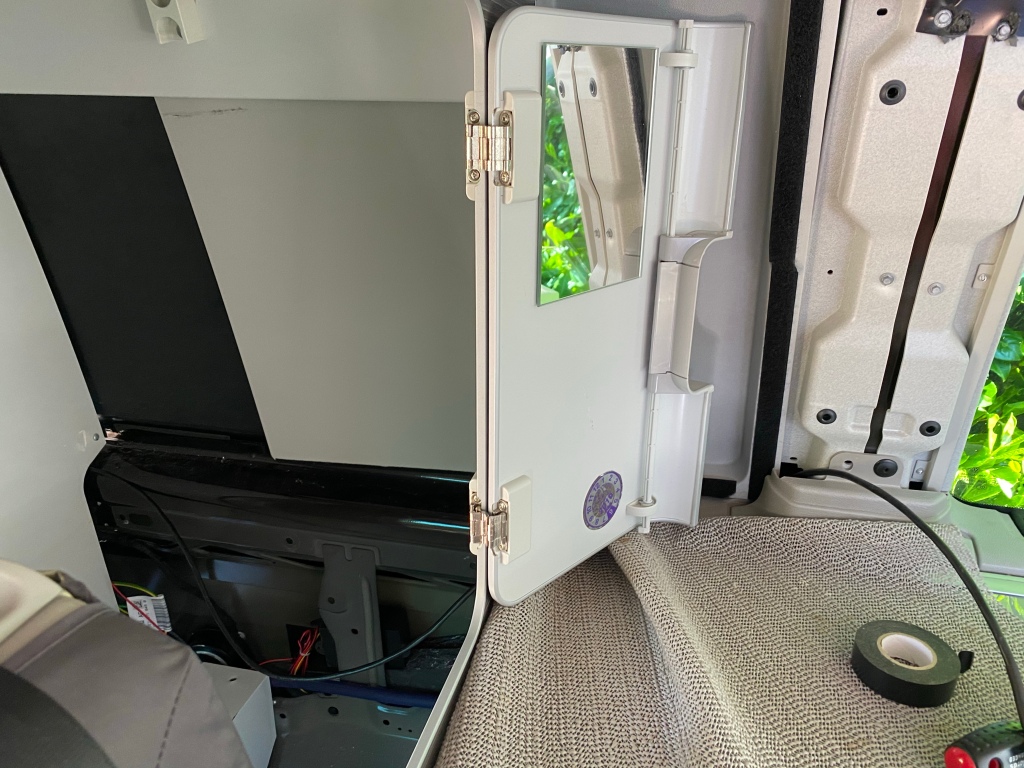
The first thing I did was empty the cupboards and then remove the four bolts which hold the passenger seat in place. The seat can then be leaned on the dash, taking care over the cable for the heated seats.

The most useful tool I used was a wire coat hanger, bent out straight. I used this step-by-step to lead a wire from the wardrobe, behind the fridge, along the top at the back of the kitchen cupboards and the down the side (see photo above – note the length of red cable at the bottom). It was then simple to bring the cable out at floor level, tuck it under the B-pillar trim and then take it to the seat base (see photo below). I disconnected the positive terminal on the vehicle battery and then made my connection to the relay under the seat, as described in the excellent instructions.
The final cable run was for the external display. This was to be fitted on the piece of trim above the cooker/fridge. That trim simply pulls off and the cable can be run across behind the fridge. I found that removing the plug holding the lower trim allowed more movement and easier access the to horizontal direction I needed to run the cable.
The cable provided by the manufacturer is only 1m and I was concerned about this rather short length, but was reassured by photos of successful installations, so I knew it was possible.
I removed the cream coloured fitting within the large wardrobe, revealing the track for the small sliding blind and a small gap behind. Fortunately, the bulky plug is easily removed from the cable, which makes passing it through a simple matter (see photo above). As usual, I took a photo of the cable before removing the connector, so I was sure the plug would be re-fitted correctly.

Using my trusty coat hanger, I led the cable just below the level of the fridge, into the big wardrobe and then into the rear wardrobe, where it makes its connection to the charge controller.
So far, I have not modified any of the stock fittings in my Cali, but now was time to take a deep breath and cut a large hole in the trim to take the display. I had a hole cutter designed for making apertures for ceiling lights and this made short work of the soft plastic. Sadly, it was not quite large enough for the display, so I used a hacksaw blade to removed a couple mm around and then finished with a file. This gave a very neat fit for the display.
It was then a case of connecting the battery wires to the charge controller, fitting the fuse to the vehicle battery connection, then the fuse for the leisure battery connection and finally the feed from the panel.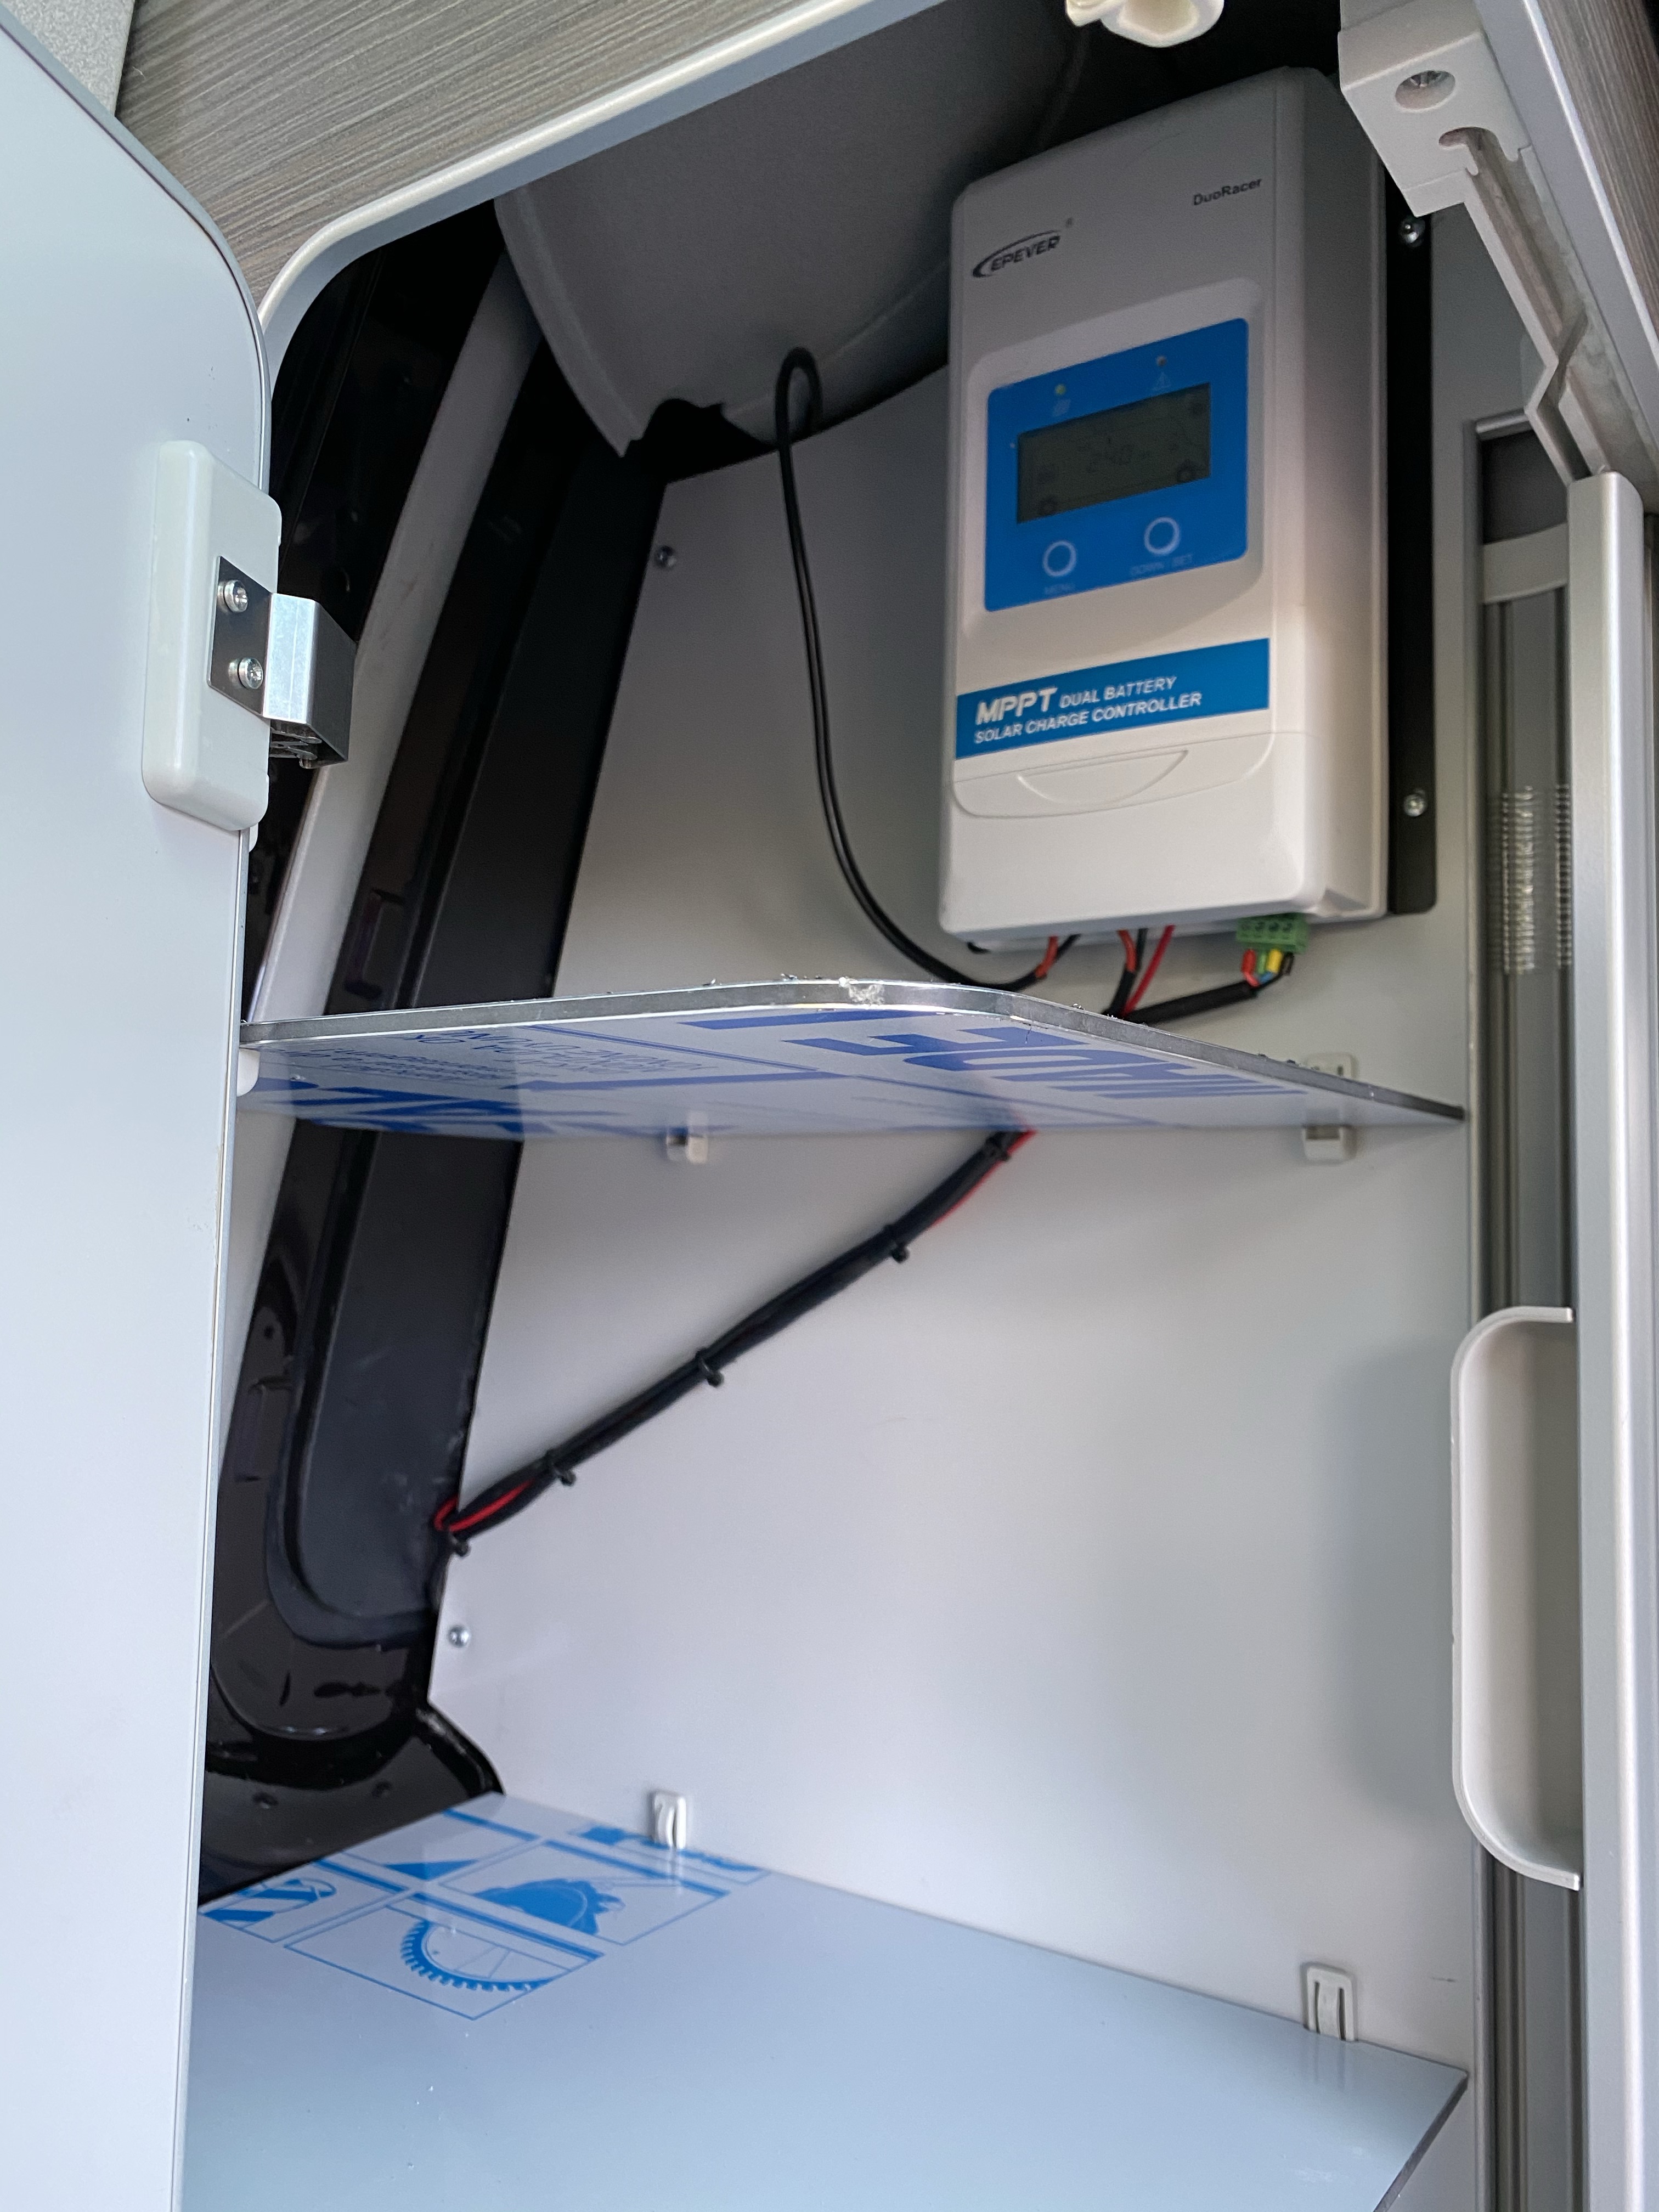
Overall I am very pleased with the install. Cosmetically, it could be more attractive, but I definitely wanted a panel which could be removed and the panel is barely noticeable when the roof is down. The aluminium frame is very strong and will prevent any vibration at motorway speed. The components could have been bought separately, but I bet it would not save any money and I have the reassurance of knowing there was someone to ask for technical support during the installation and the quality of the kit is excellent.
The output from the panel drops markedly on a cloudy day and is also strongly affected by the angle to the sun. However, in warmer weather, there should be plenty of energy from the sun for me to run the fridge full time, as well as charging all out gadgets. Time will tell…

Thank you for the pictures, it saved my day
LikeLike
Just wanted to say thanks for this great write up! Am looking at the same set-up, but hopefully with a bluetooth display instead that I think is now available.
LikeLike
Thank you, Sean! The bluetooth display was available when I fitted our system, but I was advised that it was rather flaky and I preferred to have something self-contained. In hindsight, I might not have bothered with the monitor at all really. After monitoring the voltage avidly at first, I find that it needs little attention. Still, a gadget is always nice…
LikeLike
Me again! Appreciate like all of us your camper hasn’t had as much use as it might have lately – but are you happy that you went with the one panel, and not two? We are ‘fair weather’ campers, short breaks and festivals, and will pay for EHU if available, so think one is enough. (Van is parked on the road so a big part of getting the panel is just to keep the batteries conditioned). Cheers if you see this.
LikeLike
Sod it, went for two. No more warm ciders for me 🙂
LikeLike
I have found that my single panel is enough to run the fridge continuously, though two panels cannot hurt (except the pocket!)
LikeLike